Showing posts with label Graphically Speaking. Show all posts

Friday, April 8, 2011

Pinkalicious Blog Hop - April

Girl 1st Brithday Card

Welcome to our April Pinkalicious Blog Hop. It begins with Robyn at My Pink Stamper. If you are coming from Courtney from Court's Crafts, then you are in the right place.


The theme for this Pinkalicious Blog Hop is: Birthday. I was clueless about what I should make, until....I realized I have 2 birthday parties we are going to this week. Duh! I need cards for those. So I made this cute little card for our little friend, Haley, who is turning 1. The candle on an Action Wobble, so it bounces all around.
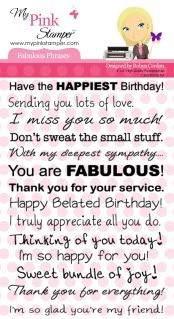
The stamp set I used is Fabulous Phrases by My Pink Stamper. This is one of my favorite stamp sets because it is perfect for cards. There is a stamp for every occasion on it and they are all on one line that can go across the width of a card.
To view all of My Pink Stamper's products and retailers click HERE.

Here is how I made the Birthday Card:
One Banner - Graphically Speaking Cricut Cartridge - 1.35"
Candle - Sweet Treats Cricut Cartridge - 5"
Haley - Once Upon A Princess - 0.86"
Most of the paper is Core'dination

How about a GIVEAWAY?

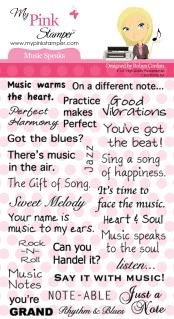
This is My Pink Stamper's Music Speaks stamp set. It has many great sayings on it. Leave me only one comment at the end of this post, telling me your favorite type of card or craft project to give to friends and family. I will pick a winner using Random.org on Thursday. As always I love readying every comment you leave me. 

From here you will hop to Kassidy at Inking It Up Crazy. When you are finished go back to Robyn at My Pink Stamper to join our challenge.

Monday, January 24, 2011

Fantabulous Cricut Challenge #44

Neglected Cricut Cartridge
-use a Cricut Cartridge that you haven't used in over 6 months. Join us for the FCCB challenge HERE.

I haven't used my Graphically Speaking Cricut Cartridge in a while. When I first got it, I had to have it. I saw so many useful cuts on it. I think most of them are better for scrapbook layouts than cards.  I have been making so many cards and have neglected scrapbooking so therefore, neglected this cartridge.

This layout was a real challenge for me because I only wanted to use this one Cricut Cartridge on it. Then, I picked such a detailed cut that it took some patience to make it. The ABC frame had so many little pieces & then I chose to use the ABC background too, so that was twice the pieces.  So I hope you enjoy this project.


Cuts and Supplies Used:

Graphically Speaking Cricut Cartridge
Button #9- Icon & Icon Blackout- ABC frame 9"
Button #9- Type- Learn 1.5"
Button #33- Icon & Icon Blackout- 1+2=3  1"


All of the solid color papers are from Core'dinations. I love using them because they cut so well on the Cricut, even on all the detailed cuts. I set my Blade at 6 & my pressure at Max.

I used pop up dots to raise up the ABC frame and add dimension.  I added rustic twine and buttons from Paper Trey Ink where I had some empty space.

Since this layout could describe the Tons Of Fun that someone could have at school...I included that stamp from My Pink Stamper's More Punny-licious stamp set.

The ribbon was something I had. I am not sure who makes it.

I also embellished with a White Jelly Roll Pen, by adding dots around the paper, since there were dots on the ribbon too.


Saturday, August 21, 2010

Anniversary Book

Today is our 6th Anniversary. I made my husband an accordion book full of our pictures & family pictures. It is neat to see how we have grown as a family over the years. He LOVED it! That made all the time & work I put into it, worth it. I love how it turned out.


Some of the supplies I use to make it:
Paper: Making Memories Wedding 8x8 paper pad

Cricut Cartridges:
"Just Because" Cards
Create A Critter
Graphically Speaking

Stamps Used:
My Pink Stamper - Family & Friends

Directions:
To make the core of the album, I cut 12x12" black paper in half. Then folded that in half to make 2-6x6" squares. Then I glued a lot of them together to create the accordion. Then I cut 5 3/4" in squares for the background papers. Then embellished with pictures, stamps, and cricut cuts.

Let me know what you think. I love comments. Even share it with your  friends. I would like to get more followers. When I reach 25 followers I will have a give away.

Friday, August 13, 2010

Tag Journal & 1st birthday card

Tag Journal

I made both of these tag journal's for gifts. Once for a baby shower & the other for a 1st birthday.
The insides are the same but the covers are different.
I used paper from K&Company Lion Sleeps 12x12 Paper Pad
I bound it with 1" book rings


All the tags are white with brown ribbon stapled to it. I left them plain so they could put a picture or write something on it.

Here is the recipe for the tag journal.
Cricut Cartridges Used:
Tags, Bags, Boxes & More:
6 - Tag - 5.65"
6 - Folders- 11.35"
2 - Covers - 11.35"
This is the folder & on my gypsy I moved the half the of the folder off my mat that I didn't need. So I only cut half the folder to make a cover. If you don't have a gypsy just cut the folder out & then cut the part off that you need for the cover.

Baby Cover:
Cricut Cartridges Used:
Plantin SchoolBook:
Baby- 1.25"
I cut it regular & then with the shadow feature also.

Quinn Cover:
Cricut Cartridges Used:
Simply Sweet:
Quinn -1.25" Blocked & Blackout Features
Graphically Speaking:
Circle- 3.15"
To make a 1/2 circle I moved it on my gypsy 1/2 off the mat so it would cut it the way I wanted.


This is a card that I made to go with Quinn's Tag Journal.
Card Recipe:
Cricut Cartridges Used:
Graphically Speaking:
number 1 collage - 1.37"
Simply Sweet:
Gift Box - 2.18" Shift & Gift Box Shadow - 2.08" Shift Shadow
Alphalicious:
1 -  1.04" Short Stack Shadow Feature

I know there are alot of instructions for this project but it is alot of fun & a great gift. Once you make one then it becomes alot easier.

Monday, July 12, 2010

3rd Birthday Card


My daughter was celebrating her 3rd Birthday this month.
This is the fun card I made her.
I also made if for a color challenge but I was so busy that weekend with her party I wasn't able to submit it. So I wanted to make sure I shared it with you.