Showing posts with label Create A Critter. Show all posts

Tuesday, July 24, 2012

My Pink Stamper - Moo-ey Doodles - Samples

Today I have two cards for you that I made using the 
Moo-ey Doodle Kit from the Pumpkin Spice Shop.
__________________________

 Happy Moo-Day To You Card


Supplies and Instructions

 Barn - Cricut Cartridge: Create A Critter -accessory & shift accessory Button #37 - Cut 2.5
Grass - Cricut Cartridge: Create A Critter - shift accessory Button #21 - Cut 1.5
Sun - I used a circle punch and trimmed the edges
Stamp - My Pink Stamper - Moo-ey Doodles
Paper - from Moo-ey Doodle Kit & Yankee Doodle Kit
Pro-Markers
Foam Adhesive
________________________

Moo-chas Gracias Card


Supplies and Instructions

Stamps - My Pink Stamper - Moo-ey Doodle
Paper - Moo-ey Doodle Kit and
DCWV The Blossoms Butterflies Stack
Pro-Markers
Foam Adhesive

Here is what comes in the Moo-ey Doodle Kit. 
To purchase your own visit Pumpkin Spice Shop HERE.


To see more projects made with the Moo-ey Doodle Kit, 


Tuesday, November 22, 2011

My Pink Stamper November Post

Gate Fold Card

This month the My Pink Stamper Design Team has made some "Special Fold Cards" for you. I chose to make a Gate Fold Card. Look below for instructions on my card. To see everyone's projects go to www.mypinkstamper.com


Supplies & Instructions

Card Base
5"x10" Score at 2 1/2" & 7 1/2"

Stamp:

Cricut Cartridges:
Create A Critter
    Elephant - Button #32 - 2"

Just Because Cards
    Doily - Button #39 shift - 4"

Glossy Accents
White Gel Pen
Ribbon
Chestnut Roan Chalk Ink

Wednesday, October 5, 2011

Autumn Wall Vinyl


I made this Vinyl Wall Art for our living room wall above our couch. We have such a long wall and I don't know what type of pictures to put there so I make Holiday Vinyls for it. See the Christmas one I made last year by clicking HERE

I designed it on my Gypsy using the following Cricut Cartridges.

Create A Critter
Leaves - Shift Layer 2 - Button #28 - Cut at 6"

Gypsy Wanderings
Autumn - Button #27 - Cut at 8"

Straight From the Nest  
Leaves - Button #29 - Cut at 9"


Stretch Your Imagination  
Leaves - Button #17- Cut at 2.84"

I cut the vinyl on a 12"x24" Mat
I used a "Kiss Cut" which means it will cut the vinyl but not the backing.
Blade depth - 3
Speed - 3
Pressure - 3
It is also important to have a sharp blade to cut the vinyl clean.
I also flipped some of the images on my Gypsy so that the leaves would mirror each other and curve around the word Autumn.

All of the vinyl I used on this project was purchased from Expressions Vinyl. They have great prices, great quality, and quick shipping.
I also really like Provo Crafts Vinyl. It can be purchased at local Craft Retailers or Cricut.com

If you have any questions about cutting vinyl, let me know. Its actually quite addicting once you get started. I want to vinyl all over my house now.

Wednesday, August 10, 2011

My Pink Stamper-NEW Release-Samples

Holloween Treat Bag


I made this cute little Goodie Bag with My Pink Stamper's NEW Spook-alicious Stamp Set

Supplies & Instructions
Tags, Bags, Boxes & More Cricut Cartridge
Bag - 6" - button #33
Tag - 1.75" - button #9
Create A Critter Cricut Cartridge
Pumpkin - 2.25"
Paper: Dream Street Papers LLC. - Sam-Hoot Hoot
Core'dinations
Twine: Paper Trey Ink

See all the NEW Releases & Design Team Samples at www.mypinkstamper.com

Visit back, Friday, Aug. 12th @ 8pm (CST) for our Pink-a-licious Blog Hop
The Blog Hop begins at www.mypinkstamper.com Friday Evening.


Saturday, May 7, 2011

NSD Challenge #10 - Pet Layout or Card

Join the National Scrapbooking Day Challenges at www.mypinkstamper.com


Recipe
Create A Critter Cricut Cartridge
Dog - Button #11 - 3.5"
Heart - Button #43 layer, hide face - 1.75"

Thursday, April 14, 2011

Gift Bag & Card inspired by Baby Clothes

Gift Bag & Card
I have a baby shower this weekend. The set of clothing was so cute that I wanted to make a gift bag and card to match. So many times I look at the color combo's or patterns in kids clothes and think, "that would make such a great card." Well, I finally made something with clothing inspiration.

The Card was inspired by this Monkey bib.
The Gift Bag was inspired by the Lion onesie.


Monkey - Create A Critter Cricut Cartridge - 3"
Pure Joy Stamp - My Pink Stamper - Sweet Baby


Lion - Create A Critter Cricut Cartridge - 4"
Roar - Create A Critter Cricut Cartridge - 1 1/2"
A baby is a gift of love Stamp - My Pink Stamper - Sweet Baby
Sweet bundle of joy! Stamp - My Pink Stamper - Fabulous Phrases


Tuesday, March 22, 2011

My Pink Stamper Design Team Post - March

Spring Scrapbook Layout


This scrapbook layout was a lot of fun to make. I knew I wanted to make it fun and springy. I originally wanted to use bolder colors but these colors looked the best together. Sorry, I have a hard time taking pictures of 2 page layouts. If you have any tips on that, please leave me a comment. Most of the paper is Core'dinations. I love how well it cuts on the Cricut with the blade at 6 and the pressure at 6. I also love how you can sand or distress the Core'dination paper to see the different core color. They come in amazing colors, too. Ok, now that you know what my favorite paper is, I will get back to my layout.


 Cloud with Bird - Create A Critter - 3"
Spring - Gypsy Wanderings - 2.5"


Flowers - Live Simply - 2.5"
These flowers had so many layers & I couldn't figure out how they were suppose to go. So this is my version of them.


 Flower Frame - Live Simply - 4"
Stamp - Familes are Forever - My Pink Stamper Everyday Life Stamp Set
Tip on putting this flower together: The dashes are a little difficult. I learned if I use the piece of paper that all the dashes were cut out of, I can lay it over the flower and know exactly where to put each dash mark. I even drew a line on paper where I started gluing the first dash mark. The reason this is a little more difficult is because the yellow circle is wider in some spots. So there are narrow and wide pink dashes. You also don't want to end up with extra space and have all your dashes glued down. But this flower is such a beautiful cut. Hope this tip makes since and is helpful.


 Butterfly - Live Simply - 2"


 Frame - Live Simply - 4"


 Tree - Simply Charmed - 6"


Sun - Create A Critter - 3"
Clouds - Create A Critter - 2"

Accented Layout with
Martha Stewart Opaque White Marker 
(it was a little transparent and wider than a pen, just the look I wanted)
Stickles - Star Dust

Thank you for visiting my Simple Creations. I hope you enjoyed my spring layout and are inspired to create. Visit Back Soon for more Simple Creations.

To see the rest of the design team's amazing layouts, go to mypinkstamper.com

Friday, March 11, 2011

My Pink Stamper Pink-alicious Blog Hop

Easter Layout

If you are just beginning this blog hop, please start at MyPinkStamper.com 
If you are coming from 
Edna's blog then you are in the right place.

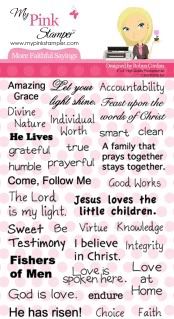
I made this Easter layout with Spring Colors and My Pink Stamper's More Faithful Sayings Stamps. I love how it turned out.

Grass was cut from Gypsy Wanderings Cricut Cartridge. Shift and it is button #42. Cut at 1.5". To create the solid grass piece across the bottom of the layout. I welded 6 grass sections together, on my gypsy, so they overlapped a little.

Basket from Doodlecharms Cricut Cartridge and cut at 2.50"
Eggs from Doodlecharms Cricut Cartridge. Large cut at 4" and Small cut at 2"
I used Glossy accents on the Eggs and Baskets. They are on pop dots so, when I applied the glossy accents the eggs curled up and made them more round like an egg.

Cute bunny!
From Create A Critter Ciruct Cartridge and cut at 2.50"

Easter was created on my Gypsy using the Alphalicious Cartridge Cricut Cartridge at 1.40". I welded the shadow letters together, angling them how I wanted to. Then I laid the normal letters over the top and lined them up just right over the shadow. Then welded the top layer together also. This made gluing them down much easier because the top layer was all one piece and the shadow was all one piece. Then I used Glossy Accents on the word to make it shinny.

I curved the stamp "He Lives" on my stamp block to stamp around this circle. The inside of the circle is a piece of Vellum that I scored lines in on my Martha Stewart Score Board to make guides to journal on. I love how it turning out. I chose to use Vellum here because I loved the patter paper and wanted it to show through.

I stamped several stamps from MPS - More Faithful Saying's Stamp Set. I lined up each side on a long acrylic block to stamp each side all at once. Then I layered it with brown paper and accented with pen stitches. Now they are ready for pictures.

Supplies Used
Pattern Paper - The Breathe Paper Collection from Prima (bought at Big Lots)
Alphalicious Cricut Cartridge
Create A Critter Cricut Cartridge
Doodlecharms Cricut Cartridge
Glossy Accents
Stazon Ink - Timber Brown
Sakura Gelly Roll White Pen 
Pop Dots

Hope you enjoyed my layout. I love all your comments and read everyone. Please come back again for more Simple Creations. I love sharing projects with you.

Next hop to:
Tracy—Craft Junkie Too
When you are finished return to My Pink Stamper to join in the fun.


Monday, February 21, 2011

Fantabulous Cricut Challenge #48

This weeks challenge on FCCB was to Emboss something on your project. It could be any form of embossing. So I chose dry embossing with an embossing folder.


I made this jungle themed baby shower invitation. 

Supplies Used
 Create A Critter Cricut Cartridge - Monkey cut 3.5"
Stamp - Sweet Baby Set from My Pink Stamper
Embossing Folder - Checkerboard by Tim Holtz, Sizzix
Copic Marker - YR00 colored monkey's ears & cheeks 
Core'dination Paper - The Chocolate Box - Brown with Green Core
Stazon Ink - Jet Black
Pop Dots
Head over to the Fantabulous Cricut Challenge Blog (FCCB) to join this fun challenge and make your own Emboss It project.

This will be my last project, designing this term, for the FCCB. It has been so much fun sharing my projects and getting to know all of you. Robin, thank you for this opportunity. This was the first design team I have ever been on. I learned so much & was challenged in my projects. Thank you for stopping by my Simple Creations & please visit back often.


Monday, January 24, 2011

Happy Birthday Robyn aka My Pink Stamper

Happy Birthday Robyn aka MPS
Today is Robyn's birthday, so I wanted to share a card that I made for her.

If you are looking for my Fantabulous Cricut Challenge Post click HERE.


Cuts & Supplies

Create A Critter Cricut Cartridge
Owl- 2 3/4"
Branch- 2"
More Punny-licious Stamps
Cuttlebug- Swiss Dots Embossing Folder
Core'dinations Paper
Pop Dots- on the Owl
Stickles- Star Dust
Glossy Accents
Sparkle Gel Pen

On the inside the card says Happy Birthday. 
I will just be getting this mailed out today. So it will get to her a bit late.

I have a funny story to go along with this card. My 3yr old daughter is ALWAYS crafting with me. I wanted to do a Frog cut & use the "Hip Hop Hooray" stamp that Robyn had at CHA last summer. My daughter kept saying, "No, mommy make the Owl!" So I did & this is what I came up with. It was a quick fun card to make.

Thursday, November 4, 2010

Gift Boxes

2" Gift Boxes

I made these 2" boxes I made for the Salon "Dream Boutique" where I sell my Simple Creations.  I bought 100 2" boxes from Uline.com and then I decorate them. I will also stuff them with the white crinkly paper for gift wrapping. I will try to share most of the details of how I made them. If you have a question about any of them please contact me & I will be happy to answer them. As, always I love all your comments.

The base paper I wrapped each box in is 1 3/4" x 8 1/2" the mat paper on top of that is 1 1/2"x8 1/2". I used my ATG gun to adhere most of the paper but that wasn't even strong enough on some of it so I also used the Scotch Quick-Dry Adhesive (Liquid).


Christmas Boxes made with Cuttlebug Dies and Embossing Folders.
I used a Christmas Embossing folder that had Christmas Sayings on it & cut each set of words to make these several different boxes.


 Joy was a stamp I had. Even the red stamp cut out on top was a Cuttlebug Die.


Believe was a metal word from Making Memories. The tree was a Cuttlebug die.


The trees were a Cuttlebug die. The snowflakes were part of that Holiday Embossing Folder that I cut sections out of. Then I filled in the snowflakes with a white gel pen. I punched a snow flake on each of the sides.


Cherish was a rub on I got in the mail.
Absolutely Fabulous was a MPS stamp that she had made just for her class at CHA but she has many more amazing stamps. Check them out here.

Thanks for Being You was a stamp I had.
Believe is a MPS stamp from the Friends and Family set.

I love you is a Making Memories Metal word.
The hearts were from Accent Essentials Cricut Cartridge. Both were
1 1/4" and welded together on my Gypsy.

Giggle is a Making Memories Metal word.
The Butterfly is from Create A Critter Cricut Cartridge and cut at
1 1/2".

Baby is from MPS Family & Friends stamp set.
Duck was cut from a Cuttlebug die.
The baby face was a stamp from Peachy Keen Stamps, Paper Doll Faces. Since I don't own any Copic Markers yet, I used watercolor pencils and a watercolor brush to color the pacifier. For the cheeks I used Pebbles Chalks.
 

Here is a close-up of the baby face.

Monday, October 4, 2010

Girl Birthday Card


Girl Birthday Card

This is a cute card for a young girl. I made it using the Create A Critter Cricut Cartridge. It is becoming my go to Cartridge for cards. Everyone likes animals. The following are the cuts I made:
Butterfly 2" - cut shadow and all layers
Turtle 1.5" - cut shadow and all layers
Grass 2" (Turtle Accessory)
The felted ric rac was from American Crafts. I got mine from Big Lots for $
The Stamp is from My Pink Stampers - Family and Friends set.


 I filled in the butterfly and turtle with this glitter glue. I bought it today from Hobby Lobby. It was very similar than Stickles but it is a much bigger bottle. My Stickles is .5 fl oz and this Glitter Glue is 1.8 fl oz. The normal price for it was $2.99 but it was on sale for 50% off so I only paid $1.50 for more than 3 times the amount of the Stickles. Don't get me wrong. I love my Stickles and use them on everything but I wanted to try this product & thought I would share it with you. I also found these really small bells I thought I could put on cards. They were normally $1.99 for 48 bells but they were on sale for 50% off so they were only $1. Both of these items I found in the Christmas Decoration section at Hobby Lobby.