I created this video to show all the great Close to my Heart products that come in the Skylark Workshop on the Go Scrapbooking Kit. Close to my Heart has great kits they put together called Workshop on the Go. They put products together and include instructions of how to put it together. Have you ever wanted to scrapbook but didn't know where to begin? Well I have. That is why I love this product because Close to my Heart has already done the work for us.
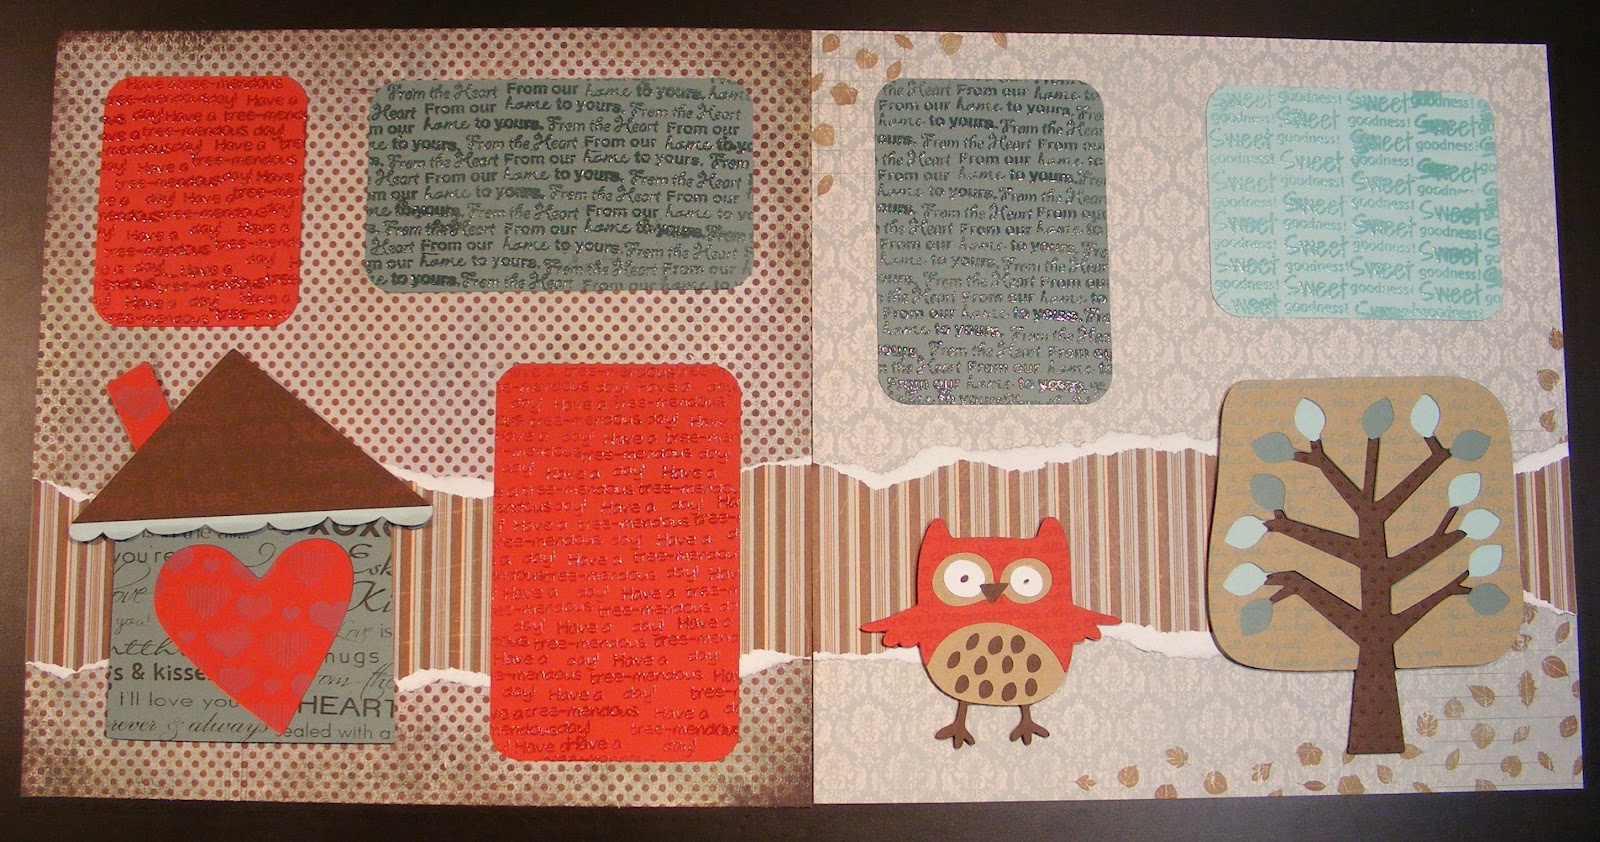
Welcome to this months post, where My Pink Stamper's design team was challenged to use as many stamps as we could. I had so much fun with this challenge. I definitely used alot of stamps. Since there are so many techniques and details in this project I included a quick video and alot of pictures to show you what I did.
When you are finished seeing my Layout, go to www.mypinkstamper.comto see all the design teams amazing projects and how they used many stamps on them.
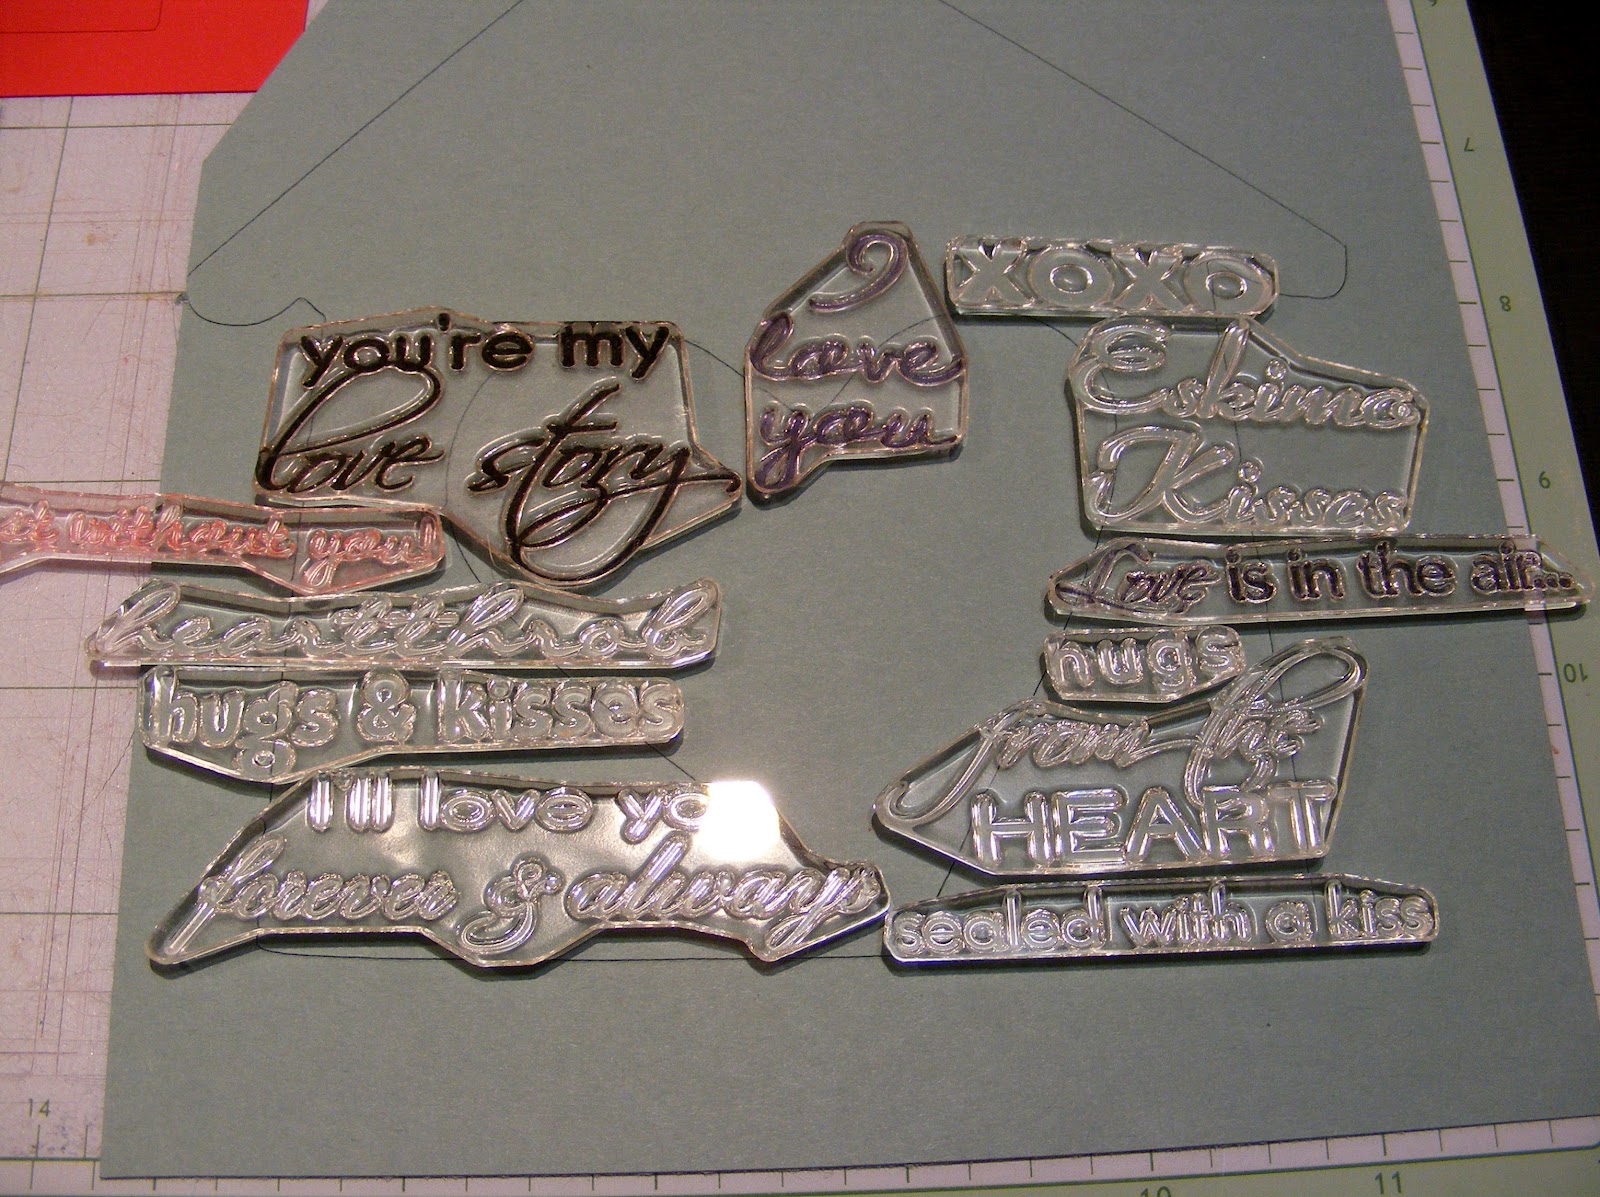
This is how I layed out my the stamps. Then I put an acrylic stamping block on it. Inked it up and stamped it. I stamped it while the cut was still on my Cricut cutting mat since the stamps went over the edges.
I used just 1 stamp over and over on the tree. It looks like a scripted pattern paper.
I embossed the center of the tree base with the Cuttlebug Swiss Dots Embossing Folder. Only the center part of the tree showed so its ok that the folder is small.
All the plain paper is by PaperTrey Ink. It is very thick and great quality. I love how it created such a dimensional tree because of all the thick layers.
On the owl I used one stamp over and over with Versa Mark watermark ink. I didn't use any embossing powder on it but left it looking watermarked.
All of these cuts were from the Hoot 'n' Holler Cricut Cartridge. It was a new cartridge that I hadn't used yet, so I picked it just for this project. I love how fun these cuts are.
This is how the red paper looked before(bottom) and after(top) I heat embossed it.
Robyn at My Pink Stamper is celebrating 12 Days of Christmas. The design team has made some special holiday projects & videos to share with you. Each day there is a new video and challenge for you to join. Check out all the fun at www.mypinkstamper.com
Nativity Card using Christmas Wishes Stamp Set
Card Instructions
Card Base: 10.5" x 5.25"
Emboss the front of the card using: Swiss Dots - Cuttlebug Embossing Folder
Cut the following out using a Cricut Machine and Paper Doll Dress Up Cricut Cartridge
Nativity - 3"
Sheep - 2.25"
Donkey - 2.25"
Camel - 2.25"
Manger - 2.5"
Baby Jesus - 2.5"
Cut the following out using a Cricut Machine and Christmas Cricut Cartridge
Star - 3.5"
After cutting out everything use a sanding block or ink to distress the edges so the whole image will appear better. I sanded Core'dinations paper because the core of the paper is another color so it creates a nice effect. On the other papers I used Tea Dye ink from PaperTrey Ink. Then I stamped "Silent Night" using My Pink Stamper's Christmas Wishes Stamp Set. The stamp paper can be adhearded to the inside of the Nativity Stable. I adhered all the pieces using Scotch Quick Dry adhesive & foam squares. You need a strong adhesive so the paper will stick to the embossed card base. Sorry when I shot my video of this card, my camera batteries weren't charged. So it died about 4 times, because I would charge them for about an hour and then film some more. So I'm sorry the video is a bit pieced together but most the details are there.
I love making Post-it Note holders with pens. Recently I have made notebook holders with pens and I love how they turned out. Everyone I share them with, loves these notebooks too. So I wanted to share them with you also. I made a video that shows in detailed how to create it. Scroll down past the video to see 3 different styles with measurements of how to make them.
These amazing Digi Stamps are from Lori Boyd. They were so much fun to color with Copic Markers. Then I cut them out and glued them down with Scotch Quick Dry adhesive. Then I accented them with Glossy Accents. Boy: Puddle Jumper Cole Girl: Puddle Jumper Gabbi Check out more of her Digi Stamps HERE.
Post-it Note Holder w/ Pen
Post-it: 3" x 3"
Cover: 7 3/8" x 3 1/4"
Score: 3 1/8", 3 1/2", 3 7/8"
Cut 2 slits 1" apart to hold Mini Pen (from Staples)
4" x 6" Notebook w/ Pen (Video)
Sketchbook: 4"x6" (from Staples)
Cover: 9 5/8" x 6 1/8"
Score: 5", 4 1/2", 4 1/8"
Cut 2 slits 1" apart to hold R.S.V.P style pen (from Staples)
Score every 1/8" along pen opening to help it bend evenly.
Note: the score marks are 3/8" and 1/2" to make a larger opening for the larger pen. If using a MINI Pen score 3/8" and 3/8" apart and trim off extra in length. These numbers are just guides to give you an idea of how to make it.
Notepad Cover w/ Pen
Notepad size: 7 1/2" x 3 1/2" (found in most dollar sections with magnet on back, some sizes will be different)
Cover: 8 3/8" x 7 5/8"
Score: 4", 4 3/8", 4 3/4"
Cut 2 slits 1" apart to hold Mini pen (from Staples)
Click HERE to see another post that I showed several of these.
I know this is alot of details. If you have any questions, feel free to email me or leave a comment. I love getting comments and hearing from all of you.
Friday night at 8pm is the Pinkalicious Blog Hop. It will start at mypinkstamper.com then hop through all the the My Pink Stamper's design team. I have an fun project to share with you then. So keep checking back for more Simple Creations.
I get so inspired my others craft rooms that I wanted to show you where I make all my projects. I have a corner of our basement. I love having my own area to craft and I can leave my supplies out. I am able to do so much crafting and card making. I find myself at in my crafting corner at least 3-4 times a week. The main time I get to craft is when my girls are napping. This is the cleanest my corner has ever looked. It won't be like that for long because I have so many projects to work on.
Sorry if it is hard to understand me in the video. I was just getting over a cold.
This morning my oldest daughter noticed the black shelf on the wall and she was so excited. My husband just hung it last night before I shot my video. My oldest daughter is 3 and she is my crafting buddy and shares in all my excitement. I wish I had a video of her when she gasped in awe, when she saw the shelf on the wall.
I hope you enjoy this video and get inspired by something you can do with your crafting area or a new way to store your supplies.
I wanted to share with you how I store my Cricut Cartridges. I got the inspiration from a youtube video & give the lady credit at the end of my video. However, I made it my own. I love using photo boxes because they are the perfect size. I think they hold about 18 cartridges, books, and overlays in each box.


.JPG)
.JPG)