Monday, February 28, 2011

Fantabulous Cricut Challenge #49 - Shape Card

Welcome to this weeks Fantabulous Cricut Challenge. Make a Shape Card (other than a square or rectangle) using the Cricut.


Emboss-Make a wish, add Glossy Accents to the heart & stickles to the pattern paper.

Supplies Used:
Sweet Treats Cricut Cartridge - Card & layers cut 5"
White Embossing Powder
Versa Mark Ink Pad
Glossy Accents - on the heart
Sakura White Gelly Roll Pen
Stickles
Visit FCCB to check out all the other design team projects and to join us for this challenge.


Thursday, February 24, 2011

Why the Gypsy is a MUST HAVE tool for the Cricut…


Comes with Cartridges - The amount of cartridges that comes with the Gypsy, makes it worth buying it.There are many places selling it for only $99.

Buy and register a Gypsy by Cricut by February 28, 2011 and receive 5 free cartridges downloaded to your Gypsy – PLUS Gypsy Wanderings and Gypsy font cartridges. Other cartridges include:
  • Blackletter
  • Tags, Bags, Boxes and More
  • Christmas
  • Indie Art
  • Printing Press
Welding letters – connect letters together so you can glue one piece instead of lots of pieces
Hiding Parts – Hide faces or cuts you don’t want
Portable – Design wherever you go. Not stuck to your computer desk or crafting table. Take your Gypsy, not all your cartridges, to a Crop. Design at the Dr.’s office or at the sports game, on a long car ride, bus or train,  ect.
Cartridge Storage – Load all your Cricut Cartridges onto your gyspy. No more switching cartridges out of the Cricut. Keeps you organized. Design with multiple Cricut Cartridges all on one mat & cut it all at once.
Precise – No more wasting paper or guessing how big it will really cut. See everything before it cuts. Put the image exactly on the mat where you want it. Use multiple pieces of paper & put them just where they need to be. When cutting vinyl for wall décor, line everything up exactly how you want it so you can transfer it right to the wall all together.
Saves Time- all these reasons are why it saves time.
Alter Images- Stretch the high or width of a rectangle to be just the right size. I’ve changed the dimensions of recipe cards or tags to be just what I wanted.
Multiply Layers (Mats)- Create with multiple layers (mats) at the same time. This helps seeing images sized up right on top of each other.  This is great when creating multiple page layouts. When creating many duplicates, put as many of the same layer on each mat, then rename the layer(mat) with how many you need to cut and what color paper. This has saved me so much time when I have 70 invitations to make.
Search- Search for a specific image or cut on the Gypsy. It will show you what cartridge it is on. You can see the images you have and also the ones you don’t have, so you know what cartridge you want to buy next.
Template- I created a template with a rectangle of an A2 sized card. Open the template and start creating…then I can know what size it need to cut everything out at because I have a layer that shows me what size the card will be.
Save your project- Have you ever made a card and loved it? You gave it away and wanted to make it again but couldn’t remember what size you cut it? You can save each of your projects so you can come back and make them again, and again. It is also a great reference when blogging because you know exactly what size you cut it and didn’t have to write it down to post later.
If after all of these reasons you still aren’t convinced why the Gypsy is a MUST HAVE, then email me & I can share why it would work for you. 
Personal Testimony- I had to replace my Gypsy and was without it for about 2 months. I didn’t know how to create without it. I couldn’t line the letters up where I wanted them. I couldn’t hide faces. I had to keep switching the cartridges out, and then I had piles of them lying all around. I couldn’t design my projects anywhere else. It was hard to search for a certain image. And the list of reasons goes on and on.

I know this post was long but I hope it was beneficial. I hope it helps you understand how beneficial creating with the Gypsy can be. Or maybe this post shows how you aren’t using your Gypsy to its full potential. 

If you would like to see how to use your Gypsy, check out these videos made by Provo Craft.

Please note: You must have a Cricut machine to hook the Gypsy up to, to cut.

Tuesday, February 22, 2011

My Pink Stamper Design Team Post

 The Lord is my light.

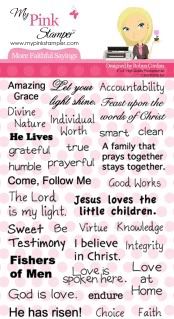
This project was to use one of Robyn (My Pink Stamper's) new stamp sets. I chose More Faithful Sayings. You can view all the MPS products HERE.

Supplies Used
Stamp- My Pink Stamper - More Faithful Sayings
Most of the Paper- PaperTrey Ink
Simply Charmed Cricut Cartridge - Button #42 - cut 3"
Inked edges - Color Box Chalk Ink - Chestnut Roan
Pen - Sakura Jelly Roll Pen
Stickles
Pop Dots

Monday, February 21, 2011

Fantabulous Cricut Challenge #48

This weeks challenge on FCCB was to Emboss something on your project. It could be any form of embossing. So I chose dry embossing with an embossing folder.


I made this jungle themed baby shower invitation. 

Supplies Used
 Create A Critter Cricut Cartridge - Monkey cut 3.5"
Stamp - Sweet Baby Set from My Pink Stamper
Embossing Folder - Checkerboard by Tim Holtz, Sizzix
Copic Marker - YR00 colored monkey's ears & cheeks 
Core'dination Paper - The Chocolate Box - Brown with Green Core
Stazon Ink - Jet Black
Pop Dots
Head over to the Fantabulous Cricut Challenge Blog (FCCB) to join this fun challenge and make your own Emboss It project.

This will be my last project, designing this term, for the FCCB. It has been so much fun sharing my projects and getting to know all of you. Robin, thank you for this opportunity. This was the first design team I have ever been on. I learned so much & was challenged in my projects. Thank you for stopping by my Simple Creations & please visit back often.


Wednesday, February 16, 2011

Guest Designer for Crafting with Cristina - Swing Card

I am so honored to be chosen as a Guest Designer for Crafting with Cristina. She inspires so many of us with techniques and videos. I love all the scrapbooking layouts she makes. If you haven't found her blog yet. Check it out HERE.

For this project I was challenged to make an interactive card. At first I wasn't sure what that meant. So I searched online and I found this awesome card called the Swing Card. This wasn't my idea. Swing cards can be found online. I found a great video tutorial at Michelle's Rubber Room. You can check out her video & design, but I am also going to share a video of how I made my card. I was so excited to shoot a video because I haven't done one in a while. Sorry, I was trying a new angle for my camera and cut out a few things, but I still included the important details.

Thank you for checking out my project today & I hope you enjoy. This is such a fun card to make.


Cricut Cuts
Sweet Treats Cricut Cartridge
Button #26 - 2" - flower, shift, layer, layer shift
Button #27 - 2" - shift, layer

Supplies
Cuttlebug- Swiss Dots Embossing Folder
Stickles- Star Dust
Stazon- Jet Black Ink
Color Box Cat Eye Ink- Rouge
Pop Dots


MPS Pinkalicious Blog hop WINNER

I am excited to announce that Random.org chose
Pam from Simply Pam  as the winner of the cherry bloom Gypsy Cover.

Thank you all for joining our blog hop. It was so much fun & so many of you left comments. I love them. I truely read all of them. I will be creating a blog post soon about why the Gypsy is a Must Have. I also want to create some videos to show how to use the gyspy, to help those who are just learning.

Check back today because I am a guest designer for Crafting with Cristina.

Monday, February 14, 2011

Winner of Fantabulous Cricut Crawl

I am excited to announce the Winner of this 
Gold Gypsy Cover from the 

Fantabulous Cricut Crawl- Share The Love is:

Snodine of Sherry's Scrapbooks & Paper
Please email me at simplecreations@live.com with your address.


I also have another Gypsy Cover give away til Wednesday, click HERE
Leave me a comment on that post for another chance to win.

Thank you to all my new followers. I love all comments & getting to know you,. I read everyone & get excited when I have more. I plan to make a post about why the Gypsy is a Must Have, soon.

FYI- cricutmachine.com has FREE SHIPPING today. Check it out!

Friday, February 11, 2011

My Pink Stamper Pink-alicious Blog Hop


To start at the beginning of the Pink-alicious Blog Hop start at mypinkstamper.com.
 If you are coming from Helen's blog then you are on track.
This month we made something using the color black, along with our favorite color. I also used My Pink Stamper's NEW Sweet Baby Stamp Set. This is an amazing stamp set if you need to make any project for baby's or kids. I have loved using them & have made so many projects already. 
To check out all My Pink Stamper stamps click HERE.


Supplies
Core'dinations Paper- Card Base is Black with Pink Core
Ribbon- Paper Studio
Border Punch- Martha Stewart
Cuttlebug- Swiss Dots Embossing Folder
Making Memories Sanding Block
Stazon Black Ink
Pen- Sakura White Gelly Roll Pen
Pink Flower Brads
My Pink Stamper Stamps- Sweet Baby
Pop Dots
Tissue Paper
ATG or tape adhesive
Stickles- Stardust

Cricut Cuts
Gypsy Wanderings
Decor Tag Function- button #1- 3"
Decor Tag Function- button #49- 2.25"
Mother's Day 2010
Baby Stroller- 2"


First, I started with the base card of 4.25" x 11". Then used the border punch along one bottom. Then embossed the dots with the cuttlebug. Stand the dots to show off the pink core. I love this paper because the outside is black and the inside is pink. Tie the ribbon into a bow around the card. Cut out the Cricut Cuts and embellish. For the accent of tissue paper I cut it as shown in the picture above.  Then I put 2 strips of my tape adhesive on it then began folding it randomly until it looked how I wanted. I hope you enjoyed this card and are inspired to create your own.


How about a Giveaway?
If you have followed my blog posts, you will know that I love my Gypsy. Soon I plan on doing a post about why the Gypsy is a MUST HAVE. In light of that I want to give away this Cherry Blossom Silicone Gypsy Cover. For a chance to win this, please leave a comment of why you think the gypsy is a MUST HAVE.  Of course I would love for you to follow my blog but that is not required.


Join us for this Challenge...
Make a project using the color Black and your favorite color. Link it at mypinkstamper.com to join in the fun.

Next Stop....
Hop on over to Tracy at Craft Junkie Too

Thank you for joining me for My Pink Stamper Pink-alicious Blog Hop.
Come back again soon for more Simple Creations.


Thursday, February 10, 2011

Magnetic Picture Frames

I made 40 magnetic picture frames for a Daddy/Daughter dance at church. A photographer will be taking 4x6 pics and then this will be a souvenir to take home. There is only adhesive on 3 sides so the photo can slide in from the top. These are just a few pictures of the designs I made. I used the amazing, My Pink Stamper Stamps for the sentiments. They are from her NEW stamp sets: Sweet Baby & More Faithful Sayings. Click HERE to check out all of My Pink Stamper Stamps. I also just out some hearts from Simply Sweet Cricut Cart and tied some ribbon around it to embellish it. For the pattern paper I used the K&Company 12x12 KP Valentine paper pad. These are simple & cute frames that you can put your favorite pictures of your loved ones in.

To create the frame I used Plantin SchoolBook to make 2 rectangles:  
Outside W-7.62" x H-5.25"
Inside W-5.51" x H-3.25"
I tried lining the rectangles up perfectly on my gyspy so it was exactly in the center of the frame.
Then I also used the outside rectangle cut for the back of the frame. I just used regular white cardstock for that.


All 40 Frames
The back of the frame
 Come back Friday night at 8pm CST for our Pinkalicious Blog Hop with all the My Pink Stamper Design Team.

Wednesday, February 9, 2011

PaperTrey Ink - Color Challenge

If you are looking for my Fantabulous Cricut Crawl- Share The Love!  Post then click HERE

PaperTrey Ink - Color Challenge
These are the colors I chose to use and make a Boy's First Birthday Card.


Action Wobble behind Sentiment

Ripe Avocado Paper & Ribbon
Ocean Tides Paper
Vintage Cream Paper
Dark Chocolate Paper
Frame Stamp - Fillable Frames #6 Stamp Set
Time To Celebrate Stamp - Fillable Frames #6 Stamp Set
All Boy Stamp - Daily Designs Sentiments

Cricut Cuts
Car- Paper Doll Dress Up - 1.75"
1- Plantin SchoolBook - 2.50"

Other Supplies
Action Wobble- used to raise up & wiggle the sentiment
Cuttlebug-Swiss Dots
Brown Gel Glitter Pen
Chestnut Roan - Cat's Eye Chalk Ink
Pop Dots - behind 1 and car

To join in this PaperTrey Ink Color Challenge click HERE.

This Friday will be our My Pink Stamper Blog Hop. We are officially calling them, My Pinkalicious Blog Hops. You can even get your very one Blog Hop badge to post on your blog from My Pink Stamper. Click HERE & copy the code on the left side.


Monday, February 7, 2011

Fantabulous Cricut Crawl- Share The Love!

Sweetheart Card - Love Is Life
 
Welcome to Simple Creations and the fourth Fantabulous Cricut Crawl...Fantabulous Cricut's version of a blog hop! 

Valentine's Day is in a week and everyone at Fantabulous Cricut has decided to Share the Love!   Each Design Team member will be featuring an original Valentine-themed project that includes the word LOVE somewhere on it.

If you've come from visiting  Andrea at http://divinedomestic.blogspot.com, you're in the right place! If you've just happened across my blog and would like to play along with our Fantabulous Cricut Crawl, start HERE.

Make sure to check out each DT member's blog for some awesome inspiration! There will be PRIZES along the way at some of our DT members' blogs, AND there will be a Grand Prize up for grabs at FCCB for one participant that submits a "Share the Love" project at FCCB!
How fun is that?

For my project...


 I curved this stamp on my block to stamp it around the circle.

 I copied this cut 4 times on my gypsy. In each cut I hid some of the cuts using this button under the advanced tab on my gypsy. I cut the hair and shoes in brown, their shirts in white, the silhouette in a pale cream color, then his pants in brown and her skirt with a patterned pink paper. This is how I was able to cut out so many colors with out repeating the same cuts over and over. I LOVE MY GYPSY! I waited 2 months to get it replaced and I didn't know how to function and create without my GYPSY. Sometime I will do a post all about why it is a Must Have.

 I shaded the cuts with my Copic Markers. I have only ever used them on white paper. I love how it made the card come to life and added detail by shading a bit. Then I gave her a stickle earing & ring.

Stamps
Love & Love is Life are both from My Pink Stamper's Love-alicious Stamp Set. These stamps are made from an amazing quality & stamp so clearly. She just released 10 new stamps sets. Check them out HERE.

 Cricut Cuts
Wild Card
Card base-blackout-4.75"
Just Because Cards
Circle-real dial size-3.91"
Frame-shift button #6-width .65" x height 3.40"
Sweethearts
Couple with layer-2.75"

How about a GIVEAWAY?

 Gypsy Gold & Black Silicone Sleeve
Leave a comment saying what your favorite feature about the Gypsy is. If you don't own a Gypsy yet then tell me one reason you would want one. I would also love if you would follow my blog so I can share many more Simple Creations with you.

Now it's your turn! 
Let's see your Share the Love projects!  Make sure to include a Cricut cut somewhere on your project and the word Love!

Next stop... 
Angji's blog, http://sweetpineapplescrapping.blogspot.com.
Go see what she has in store for you today... And when you're done, make sure to link up your project to FCCB's Fantabulous Cricut Crawl post to be entered into the contest!

Happy Crawling!