Showing posts with label Birthday. Show all posts

Monday, March 24, 2014

Celebrate Card

I wanted to create a simple quick card I could make for Birthday Parties or other Celebrations. It makes it nice to have cards made ahead of time, that I can pick from when I need to. This card design is simple enough to make multiple cards at once. 


First pick papers that go well together. I found fun papers in a Recollections "All Girl" paper pad.  I made a standard size card base from white card stock. Cut an 8 1/2" x 11" paper in half to create 2 cards. Then fold each in half to make the card base. 
Cut out stars from different patterns. I used a Cricut and the Art Philosophy Cricut Cartridge shift of button #20 and cut them at 1 1/2".
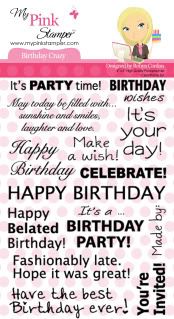
Stamp "Celebrate!" from My Pink Stamper - Birthday Crazy, or other birthday stamps you have. 
Cut and adhere the different layers of paper.  I put the stars on using 3D Zots so they would raise off the paper. Then add gems to the stars. That is a quick & simple creation. 


Wednesday, March 19, 2014

Birthday Wishes - Card


Simple Birthday Card


Basic Instructions:
Cut out a card base
Cut out a basic shape and use different papers to layer on it
Decorate with Washie Tape strips
Stamp Birthday Wishes (this is a My Pink Stamper Stamp)
Add dash marks with a white gel pen

Simple Card Instructions to make your own Birthday Wish Card. I love using Washie Tape for a quick simple way to dress up a card. It already is sticky so, all I have to do is rip it & put it on the paper. These cards are easy to make up alot so you can have them on hand when you need to give away a birthday card. I've learned I have given away most of my cards and its time to start stocking up again.


Saturday, September 7, 2013

Sweet Birthday


Today we went to our local Apple Orchard to pick apples. While we were there we bought some apple cinnamon donuts. It became part of a gift that we will take to a birthday party tonight. 

Attached to the top is a gift card holder. 
I cut it out from the Art Philosophy Cricut Cartridge (button 10, shift font layer) 


Supplies Used:
 
Stamps:
PaperTrey Ink - Background Basics: Postmarks
        - Warm Happiness Too
My Pink Stamper - Sweet Goodness

Ink:
      - Tim Holtz Distress Ink: Old Paper
      - My Pink Stamper: Darkest Night Black Hybrid Ink

Ribbon
Twine
Chipboard
Pop Dots
Washi Tape


Thursday, January 31, 2013

Birthday Invitations

Our youngest daughter Zoe turned 4 this month. I made simple birthday invitations with Imagine More Cards and the Cricut Imagine.
She also wanted a cake with balloon frosting. So this is how her cake turned out.


Saturday, August 11, 2012

Birthday Gift - Notebooks

Notebooks

I have a family birthday party to go to this month for 1yr old & 3yr old boys. The parents have asked for money to get a playground but I still wanted to give something for the boys to open. So I made these notebooks. They can be used for many different things. Some options are: A journal the mom can write in, a notebook the boys can draw or work on ABC's in, it could even be used as a scrapbook for pictures and memorabilia. The ideas are endless.

Supplies

4"x6" index cards (lined on one side if they want to write on them)
1" metal book rings
Paper
Chipboard

 Airplane: B is for Boy Cricut Cartridge - Cut 3"
Quinn - Cricut Craft Room Basics Cricut Cartridge - Cut 1"

 Inside Cover

 Lion - B is for Boy Cricut Cartridge - Cut 3.5"
Aiden - Cricut Craft Room Basics Cricut Cartridge - Cut 1"
 Inside Cover


Tuesday, May 29, 2012

30th Birthday Invitaion

Birthday Invitation


I created this Birthday Invitation to fit in a business size envelope. So that I could fit all the details and print it off on the printer and trim it to fit on the inside.
Numbers: Sweet Treat Cricut Cartridge cut at 3"
Stamp: My Pink Stamper Birthday Crazy Stamp Set
This stamp is perfect for making Birthday Invitations!

My Husband is turning 30 years old today. Happy Birthday Honey. 
I love this picture that I took while he was taking pictures on our vacation at the Bay in San Francisco, California.


Tuesday, May 22, 2012

Birthday Card Set

Birthday Cards

Made with My Pink Stamper's NEW Image Type "Birthday Doodles" Stamp Set
Robyn of My Pink Stamper just came out with some great products last week. New "Image" type stamps that can be colored in. Her very own line of ink pads, that stamp very well. They are my new go to stamp pads. Along with several more great products. This stamp set is only sold in a kit at the Pumpkin Spice Store. They sold out over the weekend but will have more in, in a couple weeks. So after seeing this post go to My Pink Stamper to see all the great new products released this past week. Then go to the Pumpkin Spice Shop to order your own Kit with the Birthday Doodles Stamp Set. All shipping at Pumpkin Spice Shop will be on hold from May 25-June 8. They had an unexpected death in the family and have to travel out of the country.


To create these cards I started with a Kraft Cardstock as the base, then found some fun birthday balloon pattern paper. I cut several circles and scallop circles, different sizes with my Cricut Expression. I colored the stamped image from Birthday Doodles with Copic Markers. Then I accented the cards with twine. Finally I put all 3 cards with envelopes in this clear card box, from PaperTrey Ink. I plan to sell this Birthday Card set at an upcoming craft sale.


Friday, April 6, 2012

My Pink Stamper - Birthday Blog Hop


BIRTHDAY Wishes

Welcome to a night of fun! The My Pink Stamper Design Team & Guests would like to welcome you to a special Blog Hop, with all Birthday Projects. You can never have enough Birthday cards. You should be hopping here from Alex, if not go back to My Pink Stamper to start at the beginning of the blog hop to find a lot of great inspiration.

We have a Birthday Party this weekend for a 4 year old boy.
So I came up with this quick simple card.


I started this card as an A2 size card until I wanted to use this blue paper for the water but it wasn't wide enough. So I cut my card down to the with of my blue paper. I love the new size. Because I cut it down, the sentiment flag can hang over the edge of the paper and still fit in an envelope.


 Supplies & Instructions
Stamp Set: My Pink Stamper - Birthday Crazy
The perfect Stamp Set for any type of Birthday Card.


Cricut Cartridge: "Just Because" Cards
Boat on button #44 - Cut at 3"

Paper: Kraft Cardstock & Cor'dinations Paper (Sand edges to add texture)

Foam Dots: used to raise up layers of the boat to add dimension

Next Hop to Helen's blog for another 
great Birthday Project.

Blog Hop Order
(incase you get lost along the way)


Tuesday, June 21, 2011

MPS June Design Team Post

Birthday Wishes


Gate Fold Card - Inside


Close-Up

 Supplies & Instructions
Gate fold card base - I wanted my finish card to measure 4"x 6" so it was 6"x 8" and scored at 2" & 6" on the long side. This is the first Gate Fold card I made and it was so super easy.
Pink Center Layer - It was originally cut about 2"x 6" then I used an EK Success Border punch on both sides of it. Then adhere it to the left side of the gate.

Straight From the Nest Cricut Cartridge
Butterfly - Button #5 - 2.75"
Oval Frame - Button #39 - 4.50"
Core'dination Paper
Glossy Accents
Brad

Visit the rest of the design team projects at www.mypinkstamper.com


Saturday, May 7, 2011

NSD Challenge #11 - Use Pink, Green and Black

Join the National Scrapbooking Day Challenges at www.mypinkstamper.com  


I posted a video for this hour on My Pink Stamper click HERE to see it.
I love how this project turned out.


Cricut Cartridge Used
Sweet Treats:
Card #25 on overlay at 5"
Tag #24 on overlay at 2.5"

NSD Challenge #6 - Tag in Project

Join the National Scrapbooking Day Challenges at www.mypinkstamper.com


Recipe
"Just Because" Cards Cricut Cartridge
Button #21 Outside 5.75" (glued on 2 sides), Inside 5.25"
Sweet Treats Cricut Cartridge
30 candles - 2.5"
Happy Birthday Stamp - My Pink Stamper - Birthday Crazy (just released yesterday)
Wishing you years of happiness! Stamp - My Pink Stamper - Everyday Sentiments 
Paper - Core'dinations (sanded)

We have a friend's birthday party today and he is turning 30. I love how this card turned out.

Friday, April 8, 2011

Pinkalicious Blog Hop - April

Girl 1st Brithday Card

Welcome to our April Pinkalicious Blog Hop. It begins with Robyn at My Pink Stamper. If you are coming from Courtney from Court's Crafts, then you are in the right place.


The theme for this Pinkalicious Blog Hop is: Birthday. I was clueless about what I should make, until....I realized I have 2 birthday parties we are going to this week. Duh! I need cards for those. So I made this cute little card for our little friend, Haley, who is turning 1. The candle on an Action Wobble, so it bounces all around.
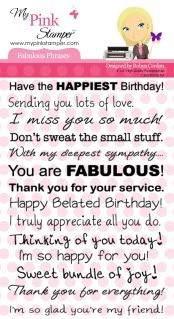
The stamp set I used is Fabulous Phrases by My Pink Stamper. This is one of my favorite stamp sets because it is perfect for cards. There is a stamp for every occasion on it and they are all on one line that can go across the width of a card.
To view all of My Pink Stamper's products and retailers click HERE.

Here is how I made the Birthday Card:
One Banner - Graphically Speaking Cricut Cartridge - 1.35"
Candle - Sweet Treats Cricut Cartridge - 5"
Haley - Once Upon A Princess - 0.86"
Most of the paper is Core'dination

How about a GIVEAWAY?

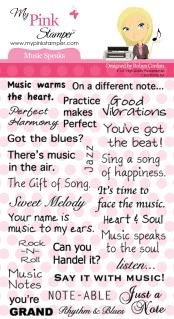
This is My Pink Stamper's Music Speaks stamp set. It has many great sayings on it. Leave me only one comment at the end of this post, telling me your favorite type of card or craft project to give to friends and family. I will pick a winner using Random.org on Thursday. As always I love readying every comment you leave me. 

From here you will hop to Kassidy at Inking It Up Crazy. When you are finished go back to Robyn at My Pink Stamper to join our challenge.

Monday, January 31, 2011

My 2 year old's Birthday Party

 Birthday Party Decor


 We celebrated my 2 yr old's Birthday with the family on Saturday. I wanted to make a banner but didn't have a pennant on any of my cartridges and didn't want to create a triangle one so I found this tag from Winter Frolic Cricut Cartridge. It is button 8 cut at width-5.35" x height 5.6". I embossed the bottom half with the Cuttlebug Swiss Dots. Then cut the white letters from Lyrical Letters Cricut Cartridge, Jumbo function at 3". I love that I was able to make a Birthday banner with what I had. If you don't have something, be creative with something you do have.


I made cupcakes for her birthday & wanted to try to make cupcake holders. These were cut from Sweet Treats Cricut Cartridge, button 10 at 7". The base of the holder ends up being about 2.5" I wasn't sure what size to make them & this was what I guessed. It left enough room to get the cupcake out without getting icing allover your fingers. I stamped them with My Pink Stamper Stamps:

These were fun to make & made the Birthday special. I can even use them over again next year.


Monday, October 4, 2010

Girl Birthday Card


Girl Birthday Card

This is a cute card for a young girl. I made it using the Create A Critter Cricut Cartridge. It is becoming my go to Cartridge for cards. Everyone likes animals. The following are the cuts I made:
Butterfly 2" - cut shadow and all layers
Turtle 1.5" - cut shadow and all layers
Grass 2" (Turtle Accessory)
The felted ric rac was from American Crafts. I got mine from Big Lots for $
The Stamp is from My Pink Stampers - Family and Friends set.


 I filled in the butterfly and turtle with this glitter glue. I bought it today from Hobby Lobby. It was very similar than Stickles but it is a much bigger bottle. My Stickles is .5 fl oz and this Glitter Glue is 1.8 fl oz. The normal price for it was $2.99 but it was on sale for 50% off so I only paid $1.50 for more than 3 times the amount of the Stickles. Don't get me wrong. I love my Stickles and use them on everything but I wanted to try this product & thought I would share it with you. I also found these really small bells I thought I could put on cards. They were normally $1.99 for 48 bells but they were on sale for 50% off so they were only $1. Both of these items I found in the Christmas Decoration section at Hobby Lobby.


Friday, August 13, 2010

Tag Journal & 1st birthday card

Tag Journal

I made both of these tag journal's for gifts. Once for a baby shower & the other for a 1st birthday.
The insides are the same but the covers are different.
I used paper from K&Company Lion Sleeps 12x12 Paper Pad
I bound it with 1" book rings


All the tags are white with brown ribbon stapled to it. I left them plain so they could put a picture or write something on it.

Here is the recipe for the tag journal.
Cricut Cartridges Used:
Tags, Bags, Boxes & More:
6 - Tag - 5.65"
6 - Folders- 11.35"
2 - Covers - 11.35"
This is the folder & on my gypsy I moved the half the of the folder off my mat that I didn't need. So I only cut half the folder to make a cover. If you don't have a gypsy just cut the folder out & then cut the part off that you need for the cover.

Baby Cover:
Cricut Cartridges Used:
Plantin SchoolBook:
Baby- 1.25"
I cut it regular & then with the shadow feature also.

Quinn Cover:
Cricut Cartridges Used:
Simply Sweet:
Quinn -1.25" Blocked & Blackout Features
Graphically Speaking:
Circle- 3.15"
To make a 1/2 circle I moved it on my gypsy 1/2 off the mat so it would cut it the way I wanted.


This is a card that I made to go with Quinn's Tag Journal.
Card Recipe:
Cricut Cartridges Used:
Graphically Speaking:
number 1 collage - 1.37"
Simply Sweet:
Gift Box - 2.18" Shift & Gift Box Shadow - 2.08" Shift Shadow
Alphalicious:
1 -  1.04" Short Stack Shadow Feature

I know there are alot of instructions for this project but it is alot of fun & a great gift. Once you make one then it becomes alot easier.

Monday, July 12, 2010

3rd Birthday Card


My daughter was celebrating her 3rd Birthday this month.
This is the fun card I made her.
I also made if for a color challenge but I was so busy that weekend with her party I wasn't able to submit it. So I wanted to make sure I shared it with you.