Showing posts with label Live Simply Cricut Lite Cartridge. Show all posts

Tuesday, April 5, 2011

Notebook with Pen

I love making Post-It note holders with pens and I never thought to make notebook covers until I saw a post that by blogging friend, Marianne from, Paper or Frabric Crafter. These notebooks are the magnetic one's you can find in the dollar sections. I decorated the outsides to go with the theme of the paper. The notebooks can be different sizes but these are the cover instructions for these. I usually make the cover with a heavy card stock, like Papertrey Ink, so that it is durable.
Notebook size: 3 1/2" x 7 1/2"
Cover size: 7 5/8" x 8 3/8"
Score cover at: 3 5/8",  4",  4 3/8",  4 3/4"
Cut middle section about 1" apart to hold pen.
When using mini pens like these the score marks are 3/8" apart. Knowing that helps alter  the measurements for other size notebooks.

 Simply Charmed Cricut Cartridge
Notes: 1"
Paper: 3.25"
Pencil: 3"


Live Simply Cricut Lite Cartridge
Flower: 2"
Stamp: Papertrey Ink - Daily Designs Sentiments


 Doodlecharms Cricut Cartridge
Apple: 2.5"
Cuttlebug Embossing Folder

COMING SOON...
I filmed a video today of a Notebook with a normal size pen and a 4x6" Sketch Pad. It also has a Lori Boyd digi stamp that I colored with Copic Markers. So check back soon to see that.

Friday night at 8pm is the Pinkalicious Blog Hop. It will start at mypinkstamper.com then hop through all the the My Pink Stamper's design team. I have an fun project to share with you then. So keep checking back for more Simple Creations.

Tuesday, March 22, 2011

My Pink Stamper Design Team Post - March

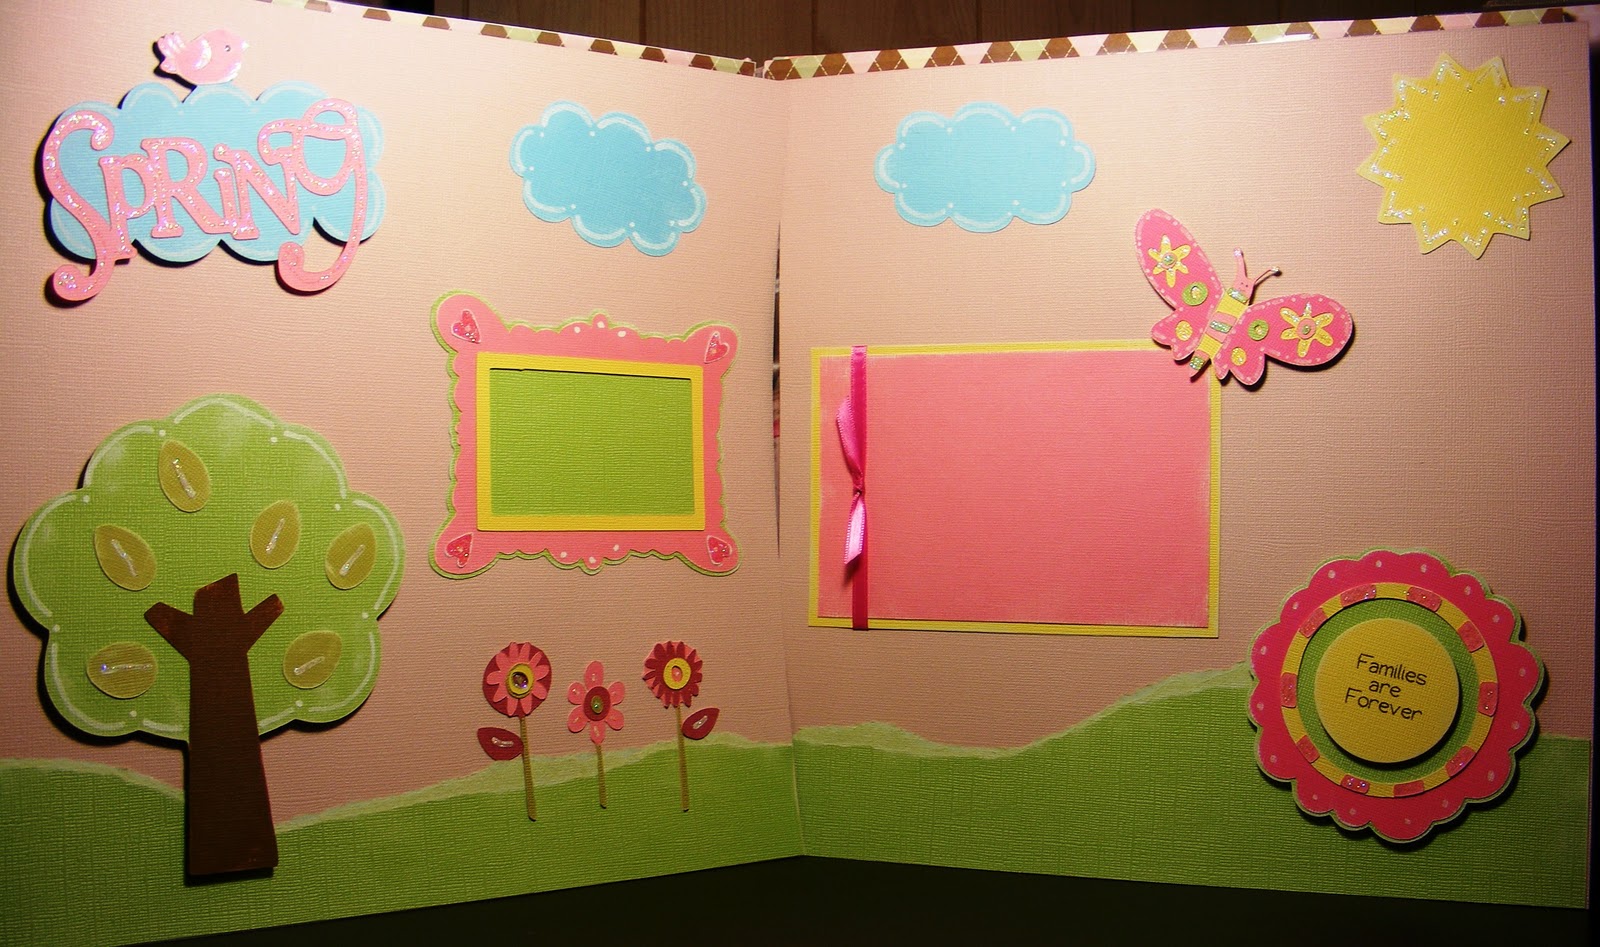
Spring Scrapbook Layout


This scrapbook layout was a lot of fun to make. I knew I wanted to make it fun and springy. I originally wanted to use bolder colors but these colors looked the best together. Sorry, I have a hard time taking pictures of 2 page layouts. If you have any tips on that, please leave me a comment. Most of the paper is Core'dinations. I love how well it cuts on the Cricut with the blade at 6 and the pressure at 6. I also love how you can sand or distress the Core'dination paper to see the different core color. They come in amazing colors, too. Ok, now that you know what my favorite paper is, I will get back to my layout.


 Cloud with Bird - Create A Critter - 3"
Spring - Gypsy Wanderings - 2.5"


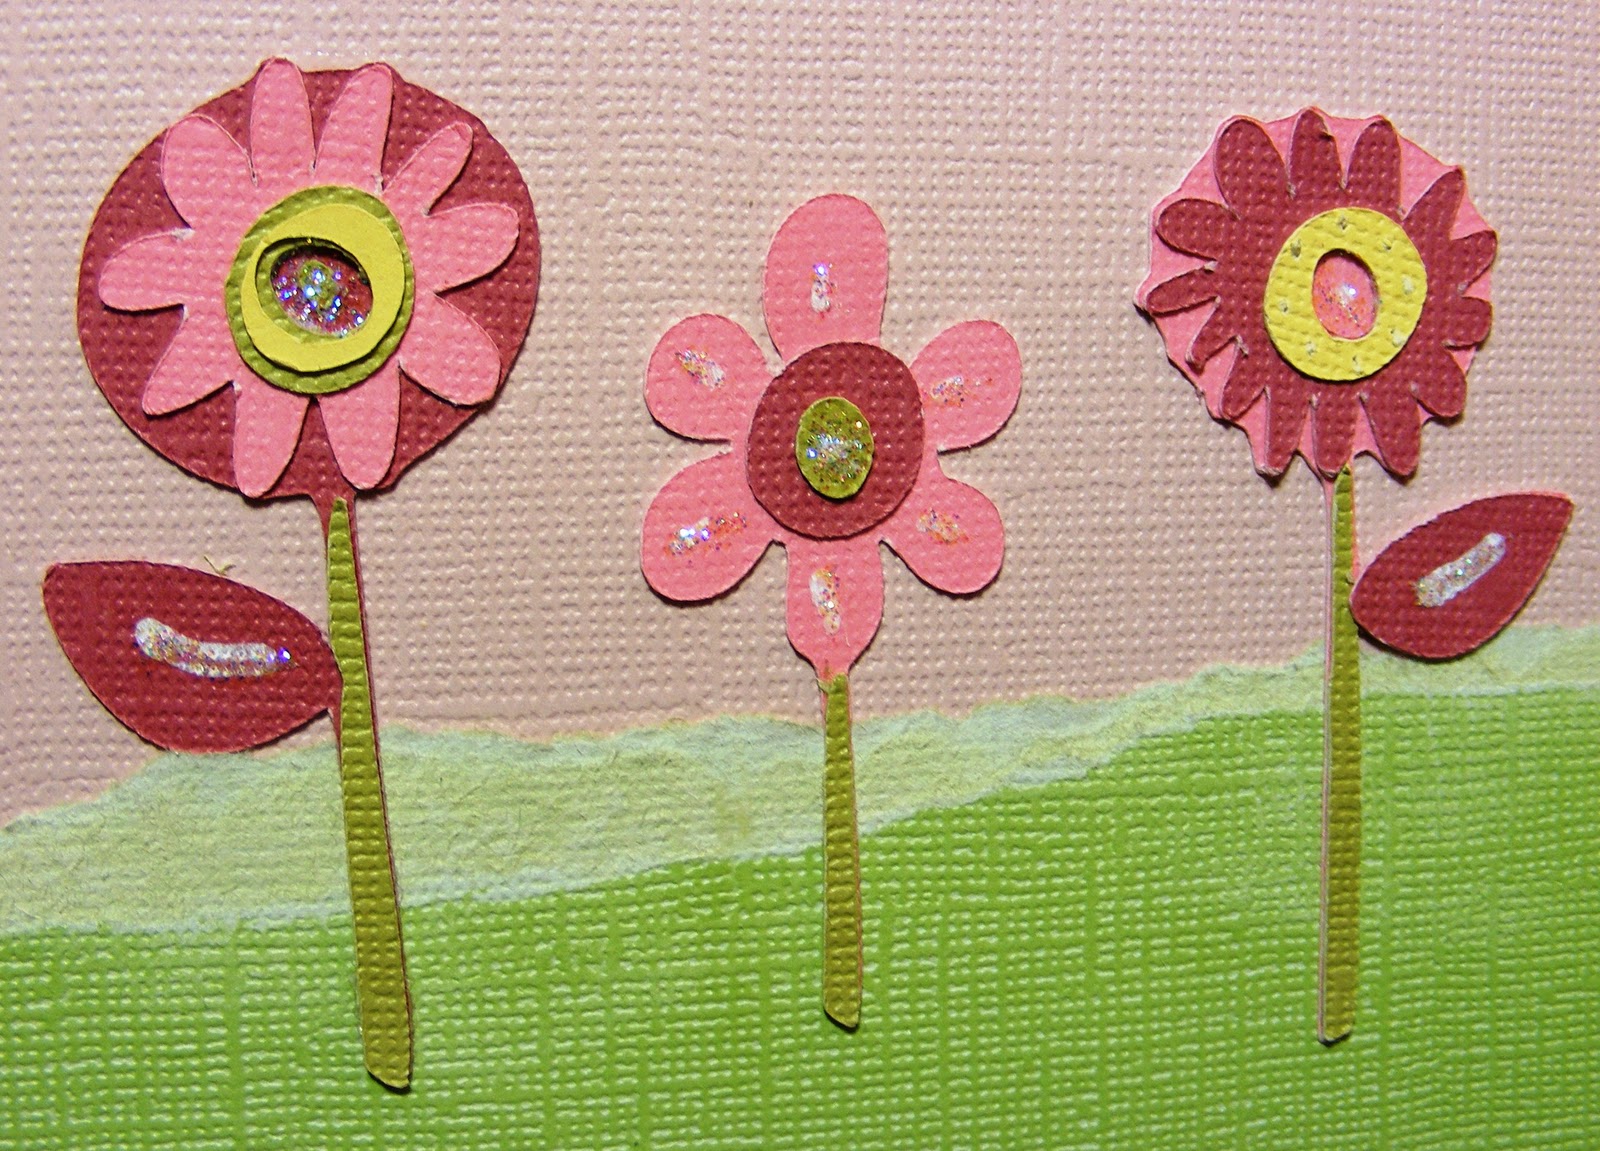
Flowers - Live Simply - 2.5"
These flowers had so many layers & I couldn't figure out how they were suppose to go. So this is my version of them.


 Flower Frame - Live Simply - 4"
Stamp - Familes are Forever - My Pink Stamper Everyday Life Stamp Set
Tip on putting this flower together: The dashes are a little difficult. I learned if I use the piece of paper that all the dashes were cut out of, I can lay it over the flower and know exactly where to put each dash mark. I even drew a line on paper where I started gluing the first dash mark. The reason this is a little more difficult is because the yellow circle is wider in some spots. So there are narrow and wide pink dashes. You also don't want to end up with extra space and have all your dashes glued down. But this flower is such a beautiful cut. Hope this tip makes since and is helpful.


 Butterfly - Live Simply - 2"


 Frame - Live Simply - 4"


 Tree - Simply Charmed - 6"


Sun - Create A Critter - 3"
Clouds - Create A Critter - 2"

Accented Layout with
Martha Stewart Opaque White Marker 
(it was a little transparent and wider than a pen, just the look I wanted)
Stickles - Star Dust

Thank you for visiting my Simple Creations. I hope you enjoyed my spring layout and are inspired to create. Visit Back Soon for more Simple Creations.

To see the rest of the design team's amazing layouts, go to mypinkstamper.com

Friday, January 14, 2011

My Pink Stamper - Blog Hop


This blog hop begins at My Pink Stamper
If you are coming from Craft Junkie Too, then you are in the right place.

I am so excited to be on the My Pink Stamper Design Team. I just wanted to share a bit about myself before I share my project with you. My name is Angela. I have been married to my amazing husband for 6 years and we have 2 little princess'. My oldest loves making cards and crafting with me. I have my own Simple Creations business where I sell my handmade cards and other creations to local people I know. I recently sold some of my creations to a local boutique. I co-lead a scrapbooking group that meets once a month. My husband and I are Assistant Pastors at our church. I run our cafe for our young adult community. So I am already living out many of my dreams. Being on this design team is one of them.

I hope you enjoy this mail box and cute little valentine I made to go along with it.


The Mail Box was cut from Love Struck 2010 Cartridge at 11.5". I covered it with a pattern paper & attached the flag with a brad. Be sure to cover it & attach the brad before gluing together.
The card was also cut from Love Struck 2010 Cartridge.  I welded 2 hearts together on my gypsy at 3" each to create the white base of the card. The blackout & top layer of the card are from the 6th button on Love Struck 2010 Cartridge. I glued those together & popped it up to add some dimension.  The butterfly's are the base of button 5 on Live Simply Cartridge. They are cut at .5" each. I bent the wings up & used stickles on the torso. The sentiment, Something Special is from My Pink Stamper's Family & Friend's Stamp Set. Of all the stamps sets I have I use this one the most. This card turned out really small but I made it to fit inside the mail box. It is a beautiful card that can be made larger & given to someone to tell them how special they are.


From here hop to Kassidy's Blog. If you would like to join in our blog hop, start at the beginning & write down the key words from each blog to find out what the challenge is. There are 2 key words you will want to write down from my blog: MAKE A.

Monday, November 29, 2010

Thinking of You - Live Simply


Thinking of You Card
Made with Live Simply Circut Lite Cartridge cut at 3 1/2"
Thinking of You - 2000 Stampin' Up
Sanded & Inked with Chestnut Roan Color Box Chalk Cats Eye
Not sure what size the scallop circle is because it was a scrap I had.

My Daughter's Card - Jolly Holidays
 This is a card my 3yr old daughter made & I wanted to share it with you. It was cut from Jolly Holidays Cricut Lite Cartridge at 4". The pink background was embossed with a Sizzix folder. Then, stamped with a stamp I got from Hobby Lobby. She asked to make a card for a friend. So she picked out what she wanted to cut. Cut it on my Cricut and glued everything. She also embossed and stamped. My daughter is passionate about what I do and with mommy's supervision she also creates great cards.