Showing posts with label Gypsy Wanderings. Show all posts

Wednesday, October 5, 2011

Autumn Wall Vinyl


I made this Vinyl Wall Art for our living room wall above our couch. We have such a long wall and I don't know what type of pictures to put there so I make Holiday Vinyls for it. See the Christmas one I made last year by clicking HERE

I designed it on my Gypsy using the following Cricut Cartridges.

Create A Critter
Leaves - Shift Layer 2 - Button #28 - Cut at 6"

Gypsy Wanderings
Autumn - Button #27 - Cut at 8"

Straight From the Nest  
Leaves - Button #29 - Cut at 9"


Stretch Your Imagination  
Leaves - Button #17- Cut at 2.84"

I cut the vinyl on a 12"x24" Mat
I used a "Kiss Cut" which means it will cut the vinyl but not the backing.
Blade depth - 3
Speed - 3
Pressure - 3
It is also important to have a sharp blade to cut the vinyl clean.
I also flipped some of the images on my Gypsy so that the leaves would mirror each other and curve around the word Autumn.

All of the vinyl I used on this project was purchased from Expressions Vinyl. They have great prices, great quality, and quick shipping.
I also really like Provo Crafts Vinyl. It can be purchased at local Craft Retailers or Cricut.com

If you have any questions about cutting vinyl, let me know. Its actually quite addicting once you get started. I want to vinyl all over my house now.

Saturday, May 7, 2011

NSD Challenge #9 - Glitz, Glam and Glitter

Join the National Scrapbooking Day Challenges at www.mypinkstamper.com


Recipe
Gypsy Wanderings Cricut Cartridge
Button #38 (shift and hide inside of shoe) - 3.75" I had to cut the tip of the shoe off to fit.
Ribbon
White Embossing Powder
Versa Mark Ink Pad
Martha Stewart tourmaline glitter & glue pad. I cut the shoe out & then pressed the glue pad on the shoe until it was covered and then poured the glitter on it.

Tuesday, March 22, 2011

My Pink Stamper Design Team Post - March

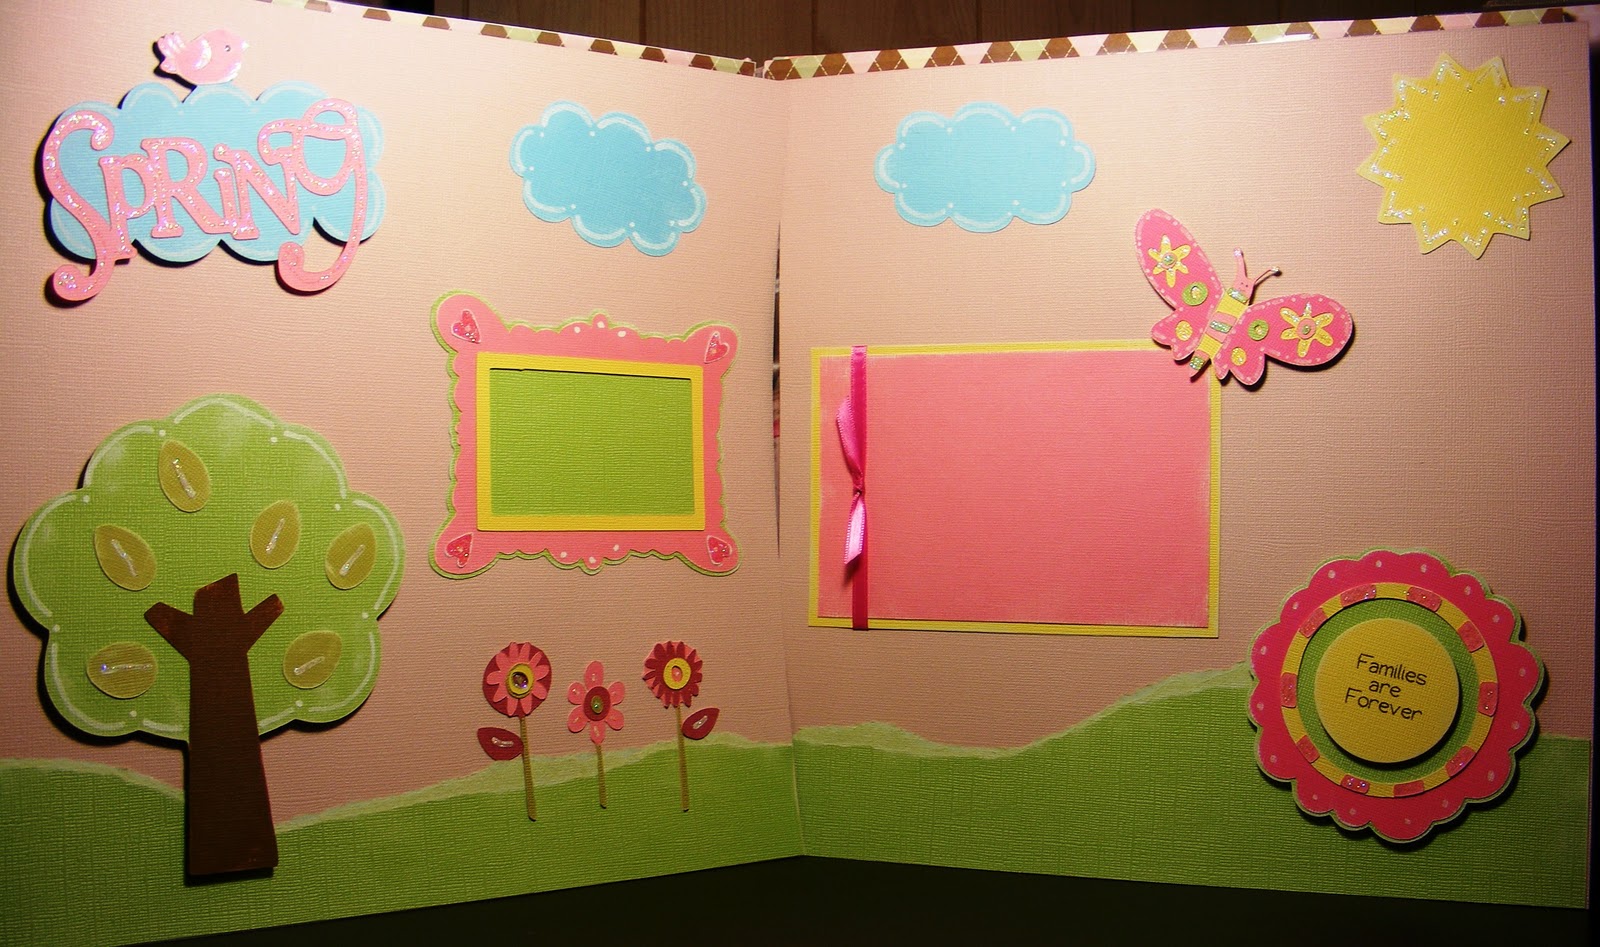
Spring Scrapbook Layout


This scrapbook layout was a lot of fun to make. I knew I wanted to make it fun and springy. I originally wanted to use bolder colors but these colors looked the best together. Sorry, I have a hard time taking pictures of 2 page layouts. If you have any tips on that, please leave me a comment. Most of the paper is Core'dinations. I love how well it cuts on the Cricut with the blade at 6 and the pressure at 6. I also love how you can sand or distress the Core'dination paper to see the different core color. They come in amazing colors, too. Ok, now that you know what my favorite paper is, I will get back to my layout.


 Cloud with Bird - Create A Critter - 3"
Spring - Gypsy Wanderings - 2.5"


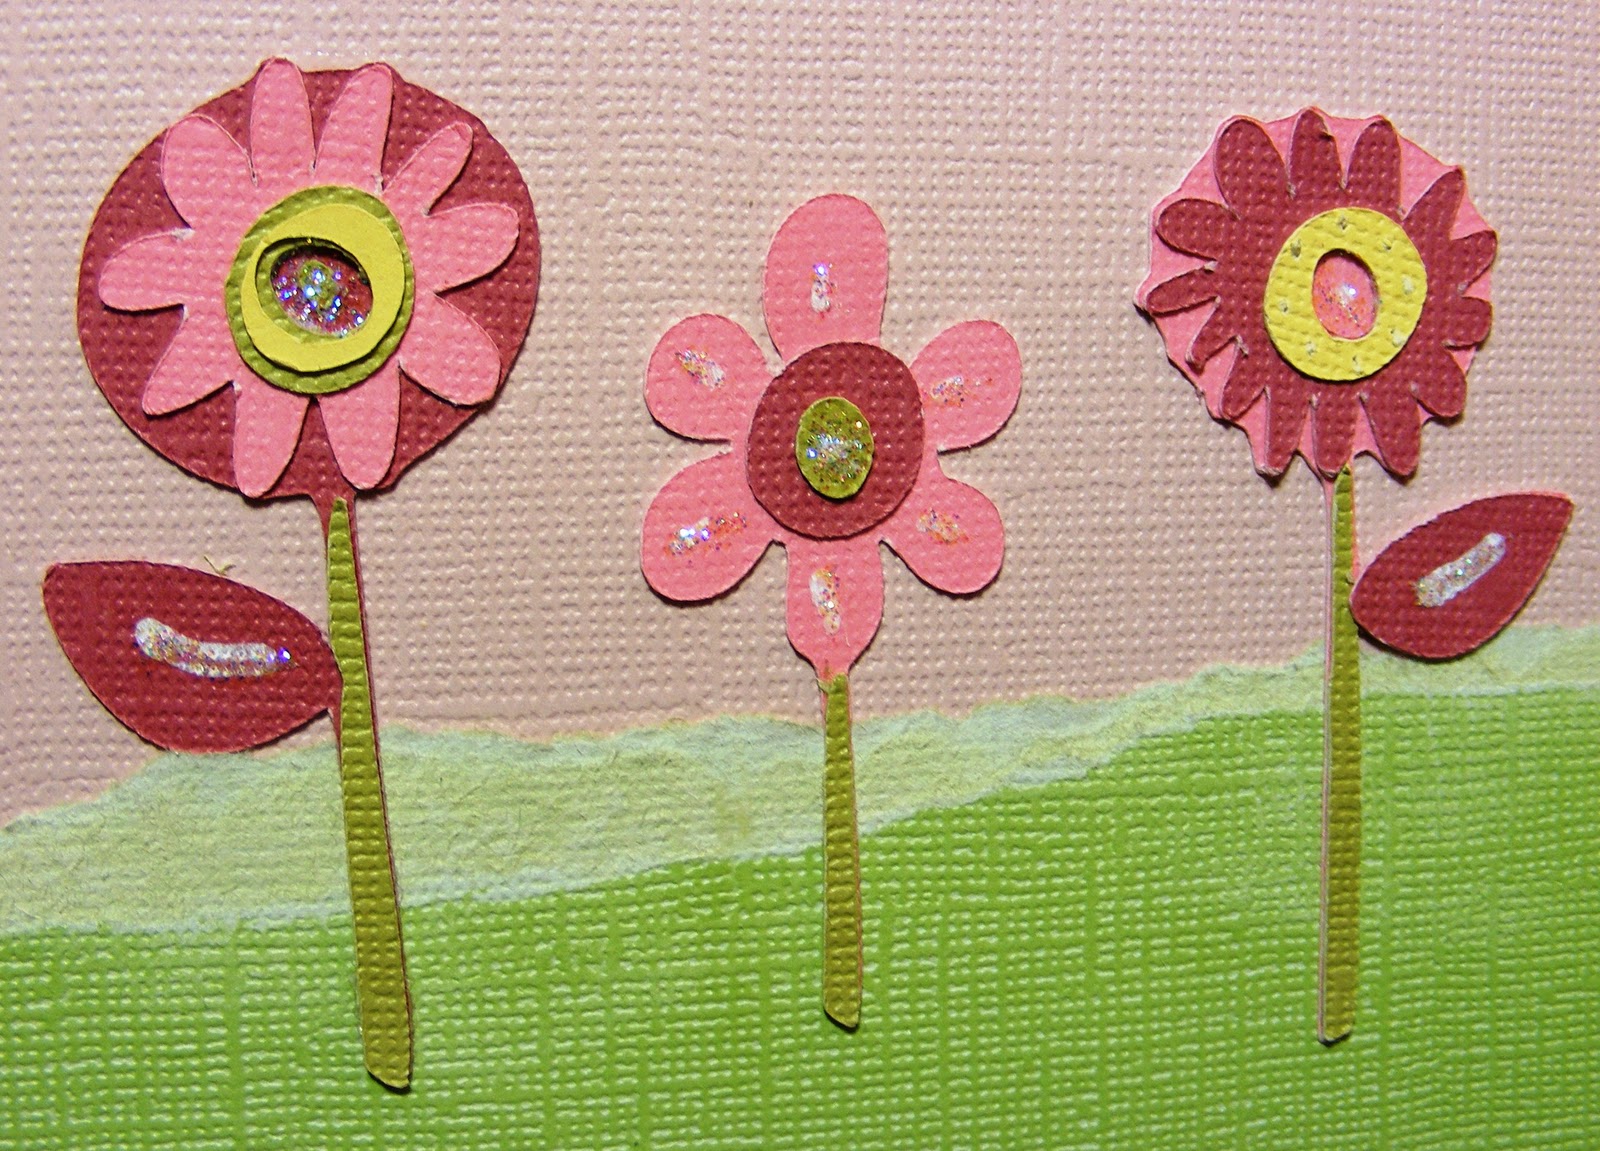
Flowers - Live Simply - 2.5"
These flowers had so many layers & I couldn't figure out how they were suppose to go. So this is my version of them.


 Flower Frame - Live Simply - 4"
Stamp - Familes are Forever - My Pink Stamper Everyday Life Stamp Set
Tip on putting this flower together: The dashes are a little difficult. I learned if I use the piece of paper that all the dashes were cut out of, I can lay it over the flower and know exactly where to put each dash mark. I even drew a line on paper where I started gluing the first dash mark. The reason this is a little more difficult is because the yellow circle is wider in some spots. So there are narrow and wide pink dashes. You also don't want to end up with extra space and have all your dashes glued down. But this flower is such a beautiful cut. Hope this tip makes since and is helpful.


 Butterfly - Live Simply - 2"


 Frame - Live Simply - 4"


 Tree - Simply Charmed - 6"


Sun - Create A Critter - 3"
Clouds - Create A Critter - 2"

Accented Layout with
Martha Stewart Opaque White Marker 
(it was a little transparent and wider than a pen, just the look I wanted)
Stickles - Star Dust

Thank you for visiting my Simple Creations. I hope you enjoyed my spring layout and are inspired to create. Visit Back Soon for more Simple Creations.

To see the rest of the design team's amazing layouts, go to mypinkstamper.com

Friday, March 11, 2011

My Pink Stamper Pink-alicious Blog Hop

Easter Layout

If you are just beginning this blog hop, please start at MyPinkStamper.com 
If you are coming from 
Edna's blog then you are in the right place.

I made this Easter layout with Spring Colors and My Pink Stamper's More Faithful Sayings Stamps. I love how it turned out.

Grass was cut from Gypsy Wanderings Cricut Cartridge. Shift and it is button #42. Cut at 1.5". To create the solid grass piece across the bottom of the layout. I welded 6 grass sections together, on my gypsy, so they overlapped a little.

Basket from Doodlecharms Cricut Cartridge and cut at 2.50"
Eggs from Doodlecharms Cricut Cartridge. Large cut at 4" and Small cut at 2"
I used Glossy accents on the Eggs and Baskets. They are on pop dots so, when I applied the glossy accents the eggs curled up and made them more round like an egg.

Cute bunny!
From Create A Critter Ciruct Cartridge and cut at 2.50"

Easter was created on my Gypsy using the Alphalicious Cartridge Cricut Cartridge at 1.40". I welded the shadow letters together, angling them how I wanted to. Then I laid the normal letters over the top and lined them up just right over the shadow. Then welded the top layer together also. This made gluing them down much easier because the top layer was all one piece and the shadow was all one piece. Then I used Glossy Accents on the word to make it shinny.

I curved the stamp "He Lives" on my stamp block to stamp around this circle. The inside of the circle is a piece of Vellum that I scored lines in on my Martha Stewart Score Board to make guides to journal on. I love how it turning out. I chose to use Vellum here because I loved the patter paper and wanted it to show through.

I stamped several stamps from MPS - More Faithful Saying's Stamp Set. I lined up each side on a long acrylic block to stamp each side all at once. Then I layered it with brown paper and accented with pen stitches. Now they are ready for pictures.

Supplies Used
Pattern Paper - The Breathe Paper Collection from Prima (bought at Big Lots)
Alphalicious Cricut Cartridge
Create A Critter Cricut Cartridge
Doodlecharms Cricut Cartridge
Glossy Accents
Stazon Ink - Timber Brown
Sakura Gelly Roll White Pen 
Pop Dots

Hope you enjoyed my layout. I love all your comments and read everyone. Please come back again for more Simple Creations. I love sharing projects with you.

Next hop to:
Tracy—Craft Junkie Too
When you are finished return to My Pink Stamper to join in the fun.


Friday, February 11, 2011

My Pink Stamper Pink-alicious Blog Hop


To start at the beginning of the Pink-alicious Blog Hop start at mypinkstamper.com.
 If you are coming from Helen's blog then you are on track.
This month we made something using the color black, along with our favorite color. I also used My Pink Stamper's NEW Sweet Baby Stamp Set. This is an amazing stamp set if you need to make any project for baby's or kids. I have loved using them & have made so many projects already. 
To check out all My Pink Stamper stamps click HERE.


Supplies
Core'dinations Paper- Card Base is Black with Pink Core
Ribbon- Paper Studio
Border Punch- Martha Stewart
Cuttlebug- Swiss Dots Embossing Folder
Making Memories Sanding Block
Stazon Black Ink
Pen- Sakura White Gelly Roll Pen
Pink Flower Brads
My Pink Stamper Stamps- Sweet Baby
Pop Dots
Tissue Paper
ATG or tape adhesive
Stickles- Stardust

Cricut Cuts
Gypsy Wanderings
Decor Tag Function- button #1- 3"
Decor Tag Function- button #49- 2.25"
Mother's Day 2010
Baby Stroller- 2"


First, I started with the base card of 4.25" x 11". Then used the border punch along one bottom. Then embossed the dots with the cuttlebug. Stand the dots to show off the pink core. I love this paper because the outside is black and the inside is pink. Tie the ribbon into a bow around the card. Cut out the Cricut Cuts and embellish. For the accent of tissue paper I cut it as shown in the picture above.  Then I put 2 strips of my tape adhesive on it then began folding it randomly until it looked how I wanted. I hope you enjoyed this card and are inspired to create your own.


How about a Giveaway?
If you have followed my blog posts, you will know that I love my Gypsy. Soon I plan on doing a post about why the Gypsy is a MUST HAVE. In light of that I want to give away this Cherry Blossom Silicone Gypsy Cover. For a chance to win this, please leave a comment of why you think the gypsy is a MUST HAVE.  Of course I would love for you to follow my blog but that is not required.


Join us for this Challenge...
Make a project using the color Black and your favorite color. Link it at mypinkstamper.com to join in the fun.

Next Stop....
Hop on over to Tracy at Craft Junkie Too

Thank you for joining me for My Pink Stamper Pink-alicious Blog Hop.
Come back again soon for more Simple Creations.


Tuesday, January 25, 2011

I'll Always Love You - MPS Card

 I'll Always Love You


 First, I want to welcome all my new followers and thank everyone for your amazing comments on my posts. I do read them all. I get so excited & I keep looking to see if I have any new comments. So feel free to leave comments on my posts. If you have any questions, just email me & I will be happy to answer them.

For our My Pink Stamper Design Team post today, it is Pink, Love, & with the Love-alicious stamp set. Go to My Pink Stamper's web site to view all the design teams amazing projects. I am sure you will be inspired and want to get these stamps for yourself.

Now for the card. Once I figured out what I wanted to create, this card was alot of fun to put together.

Cricut Cuts and Supplies Used
Gypsy Wanderings Cricut Cartridge
Card Base- button #6 Decor Tag- 7.25"(scored & folded in half)
Card Frame- button #6 Shift Decor Tag- 7.25" (scored & folded in half)
Sweethearts Cricut Cartridge
 Couple- button #4- 3.35"
Lyrical Letters Cricut Cartridge
Heart- button #44 Shift Connected- 5"

Cuttlebug Embossing Folder-Swiss Dots
Pink Rhinestone Accents- Treasures by Shabby Chic
Core'dinations Paper
Making Memories Sanding Block
Stazon Black Ink


Instructions & Tips
Cut out all the cuts on the Cricut. I used Core'dination Paper for all of it. I love that paper because it cuts so well on the Cricut, it is textured, and it has a colored core inside. Sand the edges of the cuts. Score the Frame & Card Base down the middle. Emboss the base of the card with the Embossing folder. I embossed each side of it separately so it would fit and I wouldn't have any weird lines. Glue the Frame & Card Base together. Have them folded half way when you adhere them or it won't fold well. Line them up first because there is a right & wrong way. Glue the Couple down. Stamp, I'll always love you, on the heart. Just so you know. My Pink Stamper Stamps are an AMAZING quality. You can see how crisp & fine the stamp looks. They are some of the best stamps I have ever used. Yes, I had that opinion even before I was on this design team. Ok, back to the card. I used Stickles on the top right corner of the heart. It looks like a smudge in the picture. Pop up the heart & add rhinestones around the card. On the inside of the card I added a paper since it was embossed. I rounded two of the corners with a corner rounder to follow the shape of the card.
Thank you for reading this long post. I know it is very detailed, so I could share some tips with you. 
I hope to do some videos soon to show all the details in my posts.

Wednesday, October 13, 2010

Snowmen- PKS Snow Cuties

Snowmen
I won the Snow Cutie Face- Peachy Keen Stamps from Kim at http://www.paperpunchaddiction.com/ I just got them in the mail yesterday, so I couldn't wait to try them out. I cut out several different snowmen. They were all cut at 3" and I used chalk on the cheeks. I love how they turned out and I can't wait to make more projects with them. I love snowmen. Please email me if you have any questions.


Cricut Cartridge: Very Merry Tags 3"


Cricut Cartridge: Winter Frolic 3" (shift snowman button #5 & removed face on my gypsy)
Happy Holidays -from Michael's $1 section


Cricut Cartridge: Winter Frolic 3" (shift snowman button #2 & removed inside cuts on my gypsy)


Cricut Cartridge: Gypsy Wanderings 3" (removed face on my gypsy)

Wednesday, May 5, 2010

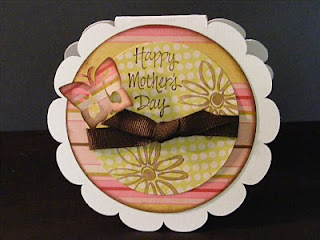
Doily Card- Happy Mother's Day

This Card has a long Reciepe but it was alot of fun to make. I designed it on my gyspy but it could be made with only a Cricut with a couple adjustments. Other Cartridges can be used for a basic circle & butterfly. Scraplift this & make it your own.
Cricut Cartridges:
Wild Card- Doily Blackout Card- Cut 4 1/4"
Mini Monograms- Circles- Cut 5 1/4" & 4 1/4" 
Gypsy Wanderings- Butterfly- Cut 1"
Paper:
White Cardstock 8 1/2"x11"
K&Company Lovely 12x12 Paper Pad - double sided
Ribbon:
Celebrate It Basic Narrows from Michaels
Stamps:
Stampin Up- Happy Mother's Day
Autum Leaves- Flower
Ink:
Color Box Fluid Chalk- Dark Brown
Tips:
The flowers were first stamped on scrap paper & then on the circle, so they would be lighter. Stamp the flowers before putting the ribbon on. The butterfly is raised up with foam squares and I bent the wings up slightly to apear flying. This could be a basic layout for many cards. Try making it & have fun!

Sunday, May 2, 2010

ScrapbookPal Design Team Entry

Friends
Card & Envelope

Supplies can be found at http://www.scrapbookpal.com/

Cricut Cartridges:
Stretch Your Imagination
Makin’ the Grade
Gypsy Wanderings
Other Supplies:
Color Box Chalk Cats Eye – Rouge
Stickles – Icicle
Paper
Zig 2 way glue pen
Glue Glider Pro or Herma Dotto
Brad

I designed this card using my Gypsy & then cut it all out at once. It can be created without the gypsy but you will have to use different flowers on the card. The card & Envelope were 4 ½” they were cut with Stretch Your Imagination Cartridge. It was the last button. The Envelope is the Silhouette function. The square layer was also cut at 4 ½”. From Making the Grade Cartridge cut Friends forever and the flower at 2”. With Gypsy Wanderings Cartridge (only on the Gypsy) cut the flower (the 6th button) and shift flower at 3 ¼”.

To assemble: Fold the card in half. Distress the edges of the square layer with Rouge Cats Eye Calk Ink. Adhere, the square layer to the front of the card with your favorite tape adhesive. Put the brad through the flower & attach to the Friends Forever. Adhere, the tall flower, with Zig 2 way glue pen, to the square layer. Adhere, the Friends Forever to the square layer with the glue pen also. Decorate the petals of the flowers with Stickles Glitter. Set the card aside to dry for a good hour. Fold the envelope on all the score marks. Glue with Zig 2 way glue pen. Also glue flower on the front of the envelope.