Showing posts with label Paper Trey Ink. Show all posts

Tuesday, March 25, 2014

PaperTrey Ink March Blog Hop Challenge


Challenge: High Gloss
I created this card for the PaperTrey Ink March Blog Hop Challenge. 
If you enjoy this project see how to follow my blog, on the right side, to see more Simple Creations. On this card I did alot of Stamping & Heat Embossing with Clear Embossing Powder to create a High Gloss shine.


Supplies:

Stamps: PaperTrey Ink Background Basics: Postmarks
Paper: PaperTrey Ink White, Hawaiian Shores, Harvest Gold
Ink: PaperTrey Ink Pure Poppy & Versa Mark
Other: Twine, Clear Embossing Powder, & Rhinestones

To create the base layer I stamped with Versa Mark ink and then heat embossed with clear embossing powder. But on the light Harvest Gold paper it didn't show up like I was hoping. So I rubbed a Pure Poppy ink pad over it. Then I wiped off the ink on the embossing with a baby wipe. I love the result. Now it really pops off the page. 

Friday, April 27, 2012

My Pink Stamper LIVE Tonight and NEW Release

Today, Robyn of My Pink Stamper released some NEW Stamp Sets. Also, her sister is in town and having a My Pink Stamper LIVE tonight at 9 CST (that's about a 1/2 hour away from when I posted this).

So go to My Pink Stamper tonight to check out all the fun!

Here is a project I made using My Pink Stamper's NEW Handle with Care Stamp Set. This is my new favorite set. There are so many fun things you can make with it. I made two different versions of this card, using different stamps.


This folder was made from a rectangle. Cut 2 1/2" x 5 1/4". Score 3 sides in a 1/2". Then cut out the 2 squares in the corners. Then angle all the edges slightly so it will fold clean. Then I used score tape so I would attach to the card securely. 


Stamp Fragile on tabbed paper.

On the back I stamped "Do Not Bend"

Supplies and Instructions
Stamps: My Pink Stamper - "NEW" Handle with Care
Cricut Cartridge: Art Philosophy
Tag and Rectangle
Folder: Rectangle cut at 2 1/2" x 5 1/4"
Paper: PaperTrey Ink

 So go to My Pink Stamper tonight to check out all the fun!

Friday, March 9, 2012

Pinkalicious Blog Hop and Giveaway

Good Luck Card
 Pin It

Welcome to the Pink-alicious Blog Hop.
If you are coming from Carissa's (Sprinkled with Glitter) Blog then you are right on track. If not, then begin the hop at www.mypinkstamper.com


The theme for this challenge is: St. Patrick's Day! Think Green! Show us a card, layout, mini book, party idea, home decor--anything! 
I had alot of fun creating this clover leaf. I cut 4 - 1 1/2" hearts from 2 different colors of paper. The top layer I scored and folded in half. Then adhered it with 1/8" score tape to hold down the center fold. I topped it off with a rhinestone that I colored with a green Copic Marker.


Instructions and Supplies
Card Base: 5 1/2" x 5 1/2"
Card Layer: 5" x 5"
Cuttlebug Embossing Folder: Seeing Spots - then sand the spots
Cricut Cartridge: Home Accents
Cut 4 - 1 1/2" hearts from 2 different colors of paper = total of 8 hearts
Sand the edges of hearts
Fold and Score the hearts that will be on top
Rhinestone: Color with green Copic Marker
Twine: PaperTrey Ink
Paper: Green - Core'dinations (3 shades of green)
Kraft - PaperTrey Ink
Round corners
Pen: White
Ink: Stazon - Timber Brown


Stamp: My Pink Stamper - Fancy Phrases Stamp Set
To see all of the My Pink Stamper stamps, click HERE.

Today I have a give away for you. 
My Pink Stamper - Encourage Me Stamp Set
This is large stamp set with great sentiments to make anyone's day special.
For a chance to win: Leave only one comment at the end of this post. 
Tell me what your favorite part of Spring is. I love getting to know my readers. 

Spring is my favorite season in the Midwest, United States. I love it when the weather begins to warm up, the flowers start to emerge out of the ground, and the trees being to bud. I love flower beds and I can't wait till it is warm enough to get outside to clean up my flower.

I will draw a winner on Tuesday.


Your next place to hop and be inspired is Andrea (Divine Domesticity)
Here is the Blog hop order in-case you get lost along the way.


Blog Hop List--March

Thank you for visiting Simple Creations Paper Crafts! 
Come back again soon for more inspirational projects.

Angela

Tuesday, February 21, 2012

My Pink Stamper - February Design Team Project - Layout

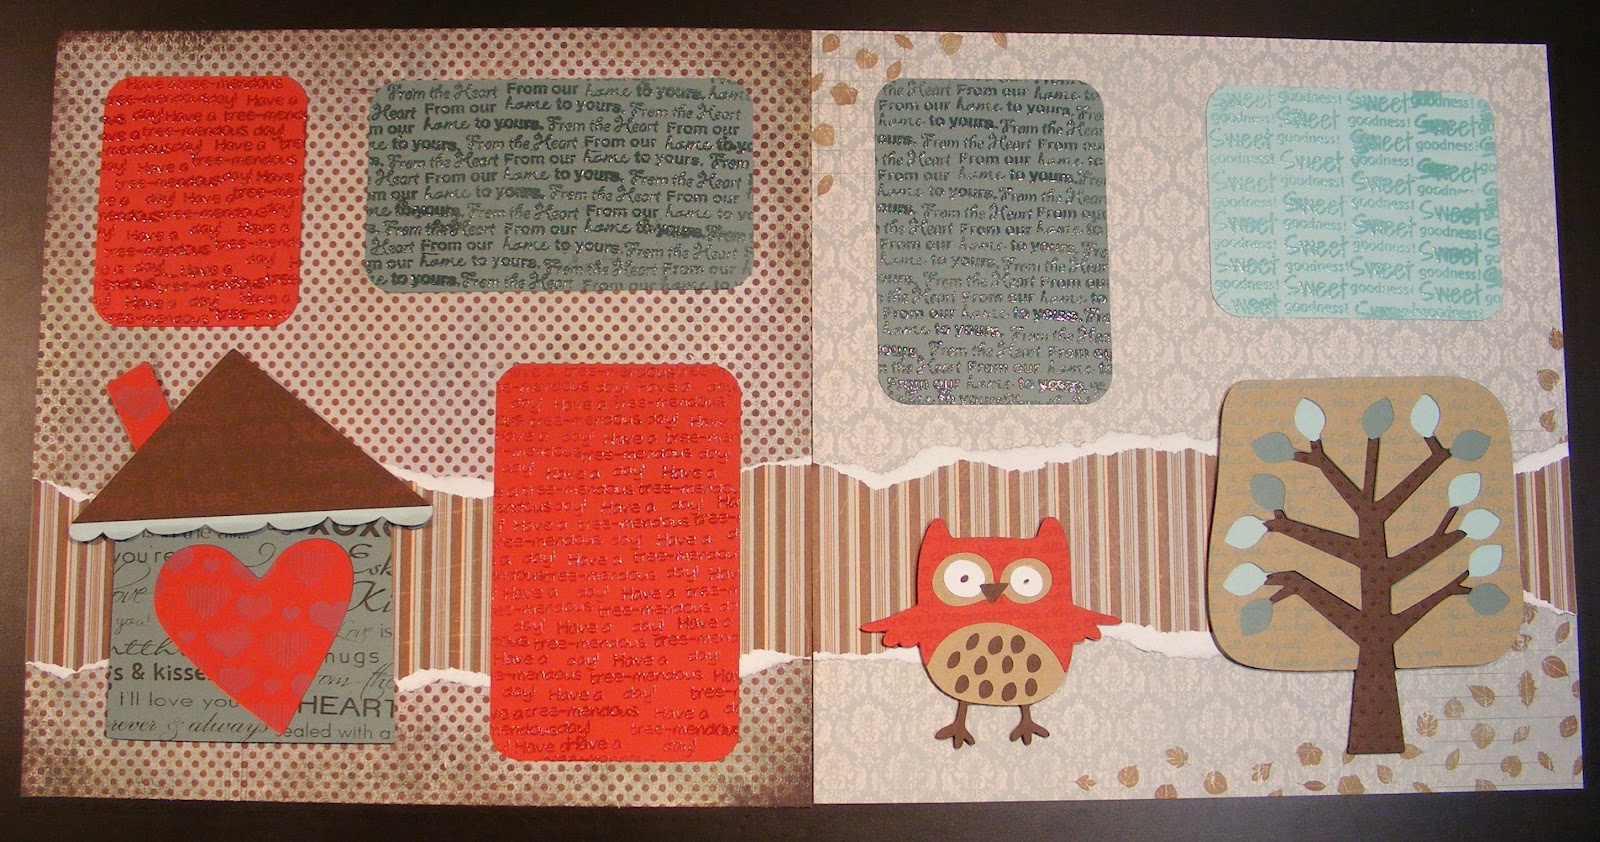
Welcome to this months post, where My Pink Stamper's design team was challenged to use as many stamps as we could. I had so much fun with this challenge. I definitely used alot of stamps. Since there are so many techniques and details in this project I included a quick video and alot of pictures to show you what I did.


When you are finished seeing my Layout, go to www.mypinkstamper.com to see all the design teams amazing projects and how they used many stamps on them.


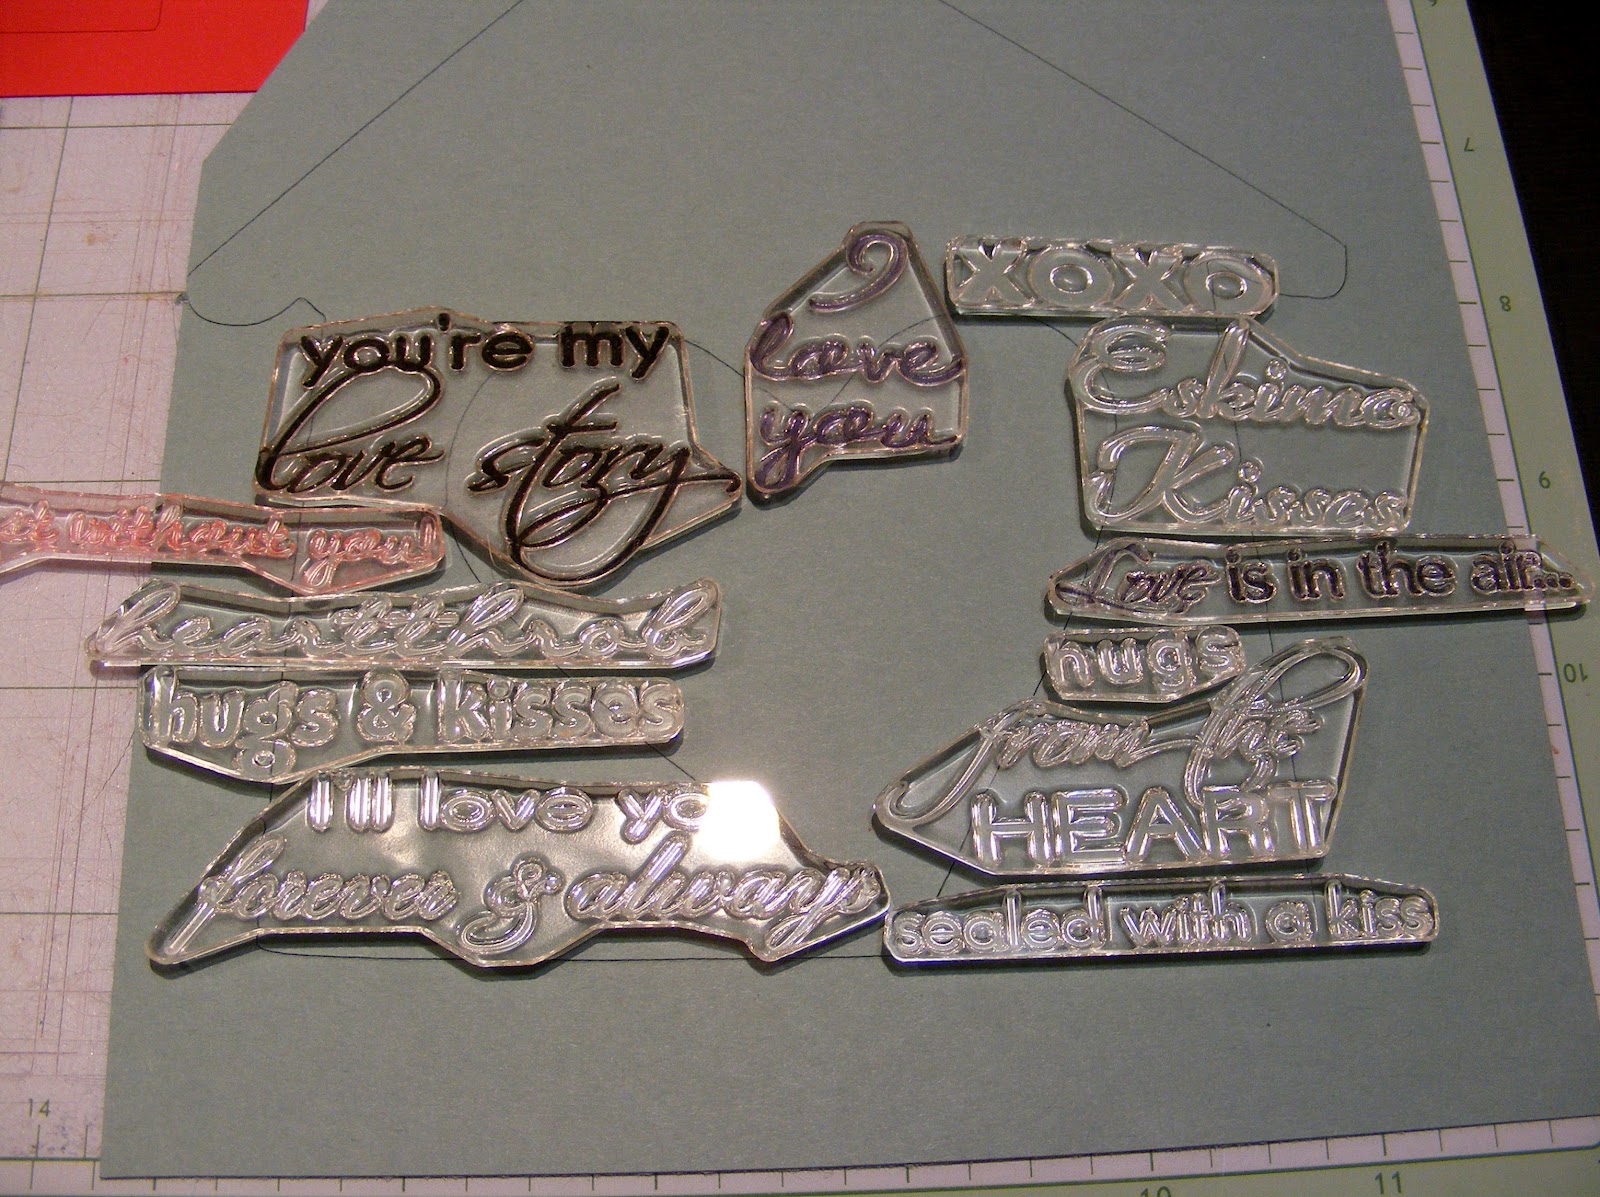
 This is how I layed out my the stamps. Then I put an acrylic stamping block on it. Inked it up and stamped it. I stamped it while the cut was still on my Cricut cutting mat since the stamps went over the edges.
 I used just 1 stamp over and over on the tree. It looks like a scripted pattern paper.
 
 I embossed the center of the tree base with the Cuttlebug Swiss Dots Embossing Folder. Only the center part of the tree showed so its ok that the folder is small.
 All the plain paper is by PaperTrey Ink. It is very thick and great quality. I love how it created such a dimensional tree because of all the thick layers.
 On the owl I used one stamp over and over with Versa Mark watermark ink. I didn't use any embossing powder on it but left it looking watermarked.
 All of these cuts were from the Hoot 'n' Holler Cricut Cartridge. It was a new cartridge that I hadn't used yet, so I picked it just for this project. I love how fun these cuts are.

This is how the red paper looked before(bottom) and after(top) I heat embossed it.


Supplies & Instructions
My Pink Stamper Stamp Set used on each of the following...
From the Heart
House
More Punny-licious
 Owl & Red Paper
Yummy-licious
 Tree, Dark Blue, and Light Blue

To order your own My Pink Stamper Stamps, click HERE.


Cricut Cartridge
Hoot 'n' Holler
House - button #4 cut at 6"
Tree - button #9 cut at 5.75"
Owl - button #45 cut at 3.5"

Paper
Solid Paper - PaperTrey Ink
Patter Paper - Dream Street Paper
(Stripes) Sam-Rock On
(Damask w/ leaves) Sam - Change is Good
Basic Gray - (Poka Dots) archaic/ancient
  
When you are finished seeing my Layout, go to www.mypinkstamper.com to see all the design teams amazing projects and how they used many stamps on them.


Friday, December 16, 2011

My Pink Stamper 12 Days of Christmas - Video & Challenge

Robyn at My Pink Stamper is celebrating 12 Days of Christmas. The design team has made some special holiday projects & videos to share with you. Each day there is a new video and challenge for you to join. Check out all the fun at www.mypinkstamper.com

Nativity Card using Christmas Wishes Stamp Set


Card Instructions
Card Base: 10.5" x 5.25"
Emboss the front of the card using: Swiss Dots - Cuttlebug Embossing Folder
Cut the following out using a Cricut Machine and Paper Doll Dress Up Cricut Cartridge
Nativity - 3"
Sheep - 2.25"
Donkey - 2.25"
Camel - 2.25"
Manger - 2.5"
Baby Jesus - 2.5"
Cut the following out using a Cricut Machine and Christmas Cricut Cartridge
Star - 3.5"
After cutting out everything use a sanding block or ink to distress the edges so the whole image will appear better. I sanded Core'dinations paper because the core of the paper is another color so it creates a nice effect. On the other papers I used Tea Dye ink from PaperTrey Ink. Then I stamped "Silent Night" using My Pink Stamper's Christmas Wishes Stamp Set. The stamp paper can be adhearded to the inside of the Nativity Stable. I adhered all the pieces using Scotch Quick Dry adhesive & foam squares. You need a strong adhesive so the paper will stick to the embossed card base. Sorry when I shot my video of this card, my camera batteries weren't charged. So it died about 4 times, because I would charge them for about an hour and then film some more. So I'm sorry the video is a bit pieced together but most the details are there.


Go to www.mypinkstamper.com to join the challenge for today. 
Create your own card with a Holiday Scene.


Tuesday, October 25, 2011

My Pink Stamper Oct. Blog Post

Ginger Bread Man Card Set

Welcome to the My Pink Stamper October Blog Post
I have a craft fair coming up so I wanted to make alot of Christmas Cards. So I am making several packages of cards. Each package will contain 6 cards that are all the same. The first package I made with a Ginger Bread Man because this was the perfect stamp for it.


 If I make this card set again I think I will find something like a Viva Decor Pen to make all the details with. there were just too many little pieces.

 Stamp from My Pink Stamper's Winter Treats & Sayings Stamp Set. This is a great Holiday Stamp Set with so many different sentiments to make the perfect card with. To check out all of the My Pink Stamper Stamps, click HERE.

 I packaged 6 cards with envelopes in a plastic card box from PaperTrey Ink. It is so hard to take a picture of something shinny without getting a glare. But in person the plastic case makes these cards look even nicer.

I finished off the card box with this Tag and another great stamp from My Pink Stamper's Winter Treats & Sayings Stamp Set.

Supplies & Instructions
Cricut Cartridge: Winter Frolic
Ginger Bread Man - button #34 - Cut at 3.5"
Tag - button #34- Cut at 2.25"
PaperTrey Ink: Paper, Plastic Card Box, Twine 
Cuttle Bug Embossing Folder
White Pen

Now you can check out all the amazing projects the design team has made at www.mypinkstamper.com

Also, I have a GIVEAWAY going on till Tomorrow (Wednesday). I'm giving away a My Memories Digital Scrapbooking software. Click HERE to see the give away post, a review of the product, and for a chance to win. If you don't win, I also have a coupon code for $10 off the software. It was a really easy program to use and it had so much to choose from.


Friday, October 14, 2011

Pinkalicious Blog Hop - Cherry on Top Party Favor

Cherry on Top
Cupcake - Party Favor

Welcome to the Pinkalicious Blog Hop. This is where all the My Pink Stamper Designers get to show off our projects using My Pink Stamper High Quality Photo Polymer Stamps. If you are just starting to Hop, then go back to the beginning at Robyn (My Pink Stamper). If you have hopped here from Andrea then you are in the right place.


Supplies & Instructions
Cricut Cartridge: Sweet Treats
Cupcake Party Favor - Button #4 - Party Favor - Cut at 4"
Tag - Button #4 - Tag - Cut at 3.25"
Pen: Sakura White Gelly Roll
Paper: Paper TreyInk & Core'dinations
Paper Filler
Ribbon
Twine

Thank you for checking out my project and I hope I inspired you with this Simple Creation. The next stop on the Hop is Renee (RockinRenee). If you lose your place along the way, see the Blog Hop Order is below.

Blog Hop Order
 
 June


Tuesday, September 20, 2011

My Pink Stamper Design Team Post - Halloween Bag

Here is a cute little goodie bag for all those yummy goodies.


Supplies and Instructions

Cricut Cartridges
Tags, Bags, Boxes & More: 
Bag - Button #35 - cut 9.25"
Tag - Button #8 - Regular & Shadow cut 2"
Simply Charmed:
Bat -Button #32 - cut 1.75"
Button & Twine - PaperTrey Ink
Ribbon
White Pen
Glossy Accents - on the spider
Crinkle Paper

Go to www.mypinkstamper.com to see the rest of the design teams amazing projects.


Wednesday, September 7, 2011

Christmas Card -Embossing & Copics

I was playing around with these Nature's Reflection-Evergreen Tree stamps that I rented from Raisin Boat. I learned a fun technique by just trying something different.

First, I stamped the trees with Versa Mark Watermark Ink, then poured White Embossing Powder on it. Then, I heated it with a heat tool. Then, I took about 5 green Copic Markers and made dots all over the trees. Then, I used the heat tool on the trees again and that absorbed the Copic ink into the White Embossing Powder. While it was still hot, I sprinkled Stampendous-Crystal Snow-White on the trees. Then I heated it up again to set everything. You can't really tell in the picture but the Crystal Snow made the trees Sparkle. I did the same technique with the snowy rocks.
Then, I embossed the Sentiment from My Pink Stamper's-Christmas Wishes Stamp Set. I also tied PaperTrey Ink twine around the card. I loved how it turned out.


Supplies
Paper - PaperTrey Ink
Ink - Versa Mark - Watermark
Embossing Powder - Stampendous - White
Glitter - Stampendous - Crystal Snow - White Ultra Fine
Stamps- Raisin Boat - Natures's Reflection
My Pink Stamper - Christmas Wishes

The Idea Room is having a Linking Up Party. So head over there to link up your own project and get to meet many more great bloggers. Click HERE to check it out.

Friday, August 12, 2011

My Pink Stamper Pink-alicious Blog Hop

Welcome to Simple Creation's and My Pink Stamper's Pink-alicious Blog Hop. If you came from June then you are right on track. If you are just begining the hop, then go to www.mypinkstamper.com to start at the beginning.


Hi, I'm Angela.  I want to start off sharing a bit about myself so you can get to know me. I love to craft and do anything with my hands. I get to stay home with our two little girls. They keep me very busy so I try to craft during nap time or when I get a chance. My four year old crafts with me and knows how to use every tool.

God is a huge part of my life. My husband and I are pastors at an amazing church. I am very involved with the Nursery, Young Adults, Worship Team and run our Young Adult Cafe. So even though I "stay home" life is always busy, but I love what I do.

I love to craft with my Gypsy, Cricut Expression, Cuttlebug, Stamps, & Copic Markers. My favorite paper line is Core'dinations because it cuts so well on the Cricut and then I can sand it to accent another color. I love the quality of My Pink Stamper Stamps. They stamp so well & work with both Scrapbooking & Card Making. I am honored to be on this design team for a second term and look forward to getting to know you more. I love reading all your comments.


Supplies & Instructions
Cricut Cartridge: Straight From the Nest - button #33 - cut at 3"
Cuttlebug Embossing Folder: Seeing Spots
Ink: Stazon - Timber Brown
Embelishment: Glossy Accents
Twine: PaperTrey Ink
Paper: Raisin Boat & Core'dinations
Pen: Sakura White Gelly Roll