Showing posts with label Sweet Treats. Show all posts

Tuesday, May 29, 2012

30th Birthday Invitaion

Birthday Invitation


I created this Birthday Invitation to fit in a business size envelope. So that I could fit all the details and print it off on the printer and trim it to fit on the inside.
Numbers: Sweet Treat Cricut Cartridge cut at 3"
Stamp: My Pink Stamper Birthday Crazy Stamp Set
This stamp is perfect for making Birthday Invitations!

My Husband is turning 30 years old today. Happy Birthday Honey. 
I love this picture that I took while he was taking pictures on our vacation at the Bay in San Francisco, California.


Friday, November 11, 2011

My Pinkalicious Blog Hop - November Scrapbook Page


Pinkalicious Blog Hop - November
Love Scrapbook Page using My Pink Stamper's "From the Heart" Stamp Set.

Welcome to the Pinkalicious Blog Hop. This is where all the My Pink Stamper Designers get to show off our projects using My Pink Stamper High Quality Photo Polymer Stamps. This month we wanted to show you how to use stamps on Scrapbook Pages or Mini Albums. If you are just starting to Hop, then go back to the beginning at Robyn (My Pink Stamper). If you have hopped here from Renee (RockinRenee) then you are in the right place.


I love how all these papers came together. The Striped Pattern paper is from a Christmas Paper Pack. It's amazing how you can pull different papers together to make a great layout.


I used border punches from EK Sucess to create a story book feel & accented it with We R Memory Keepers - Blue Lagoon - Baker's Twine.


Love is Cut from:
Sweethearts Cricut Cartridge
Button #3 at 2 1/2"


This is a beautiful stamp. I love how elegant "love story" is. This stamp set includes four different sized heart stamps. Great for accents anywhere.


Another elegant stamp. I've learn it is very simple to incorporate stamps into everyday scrapbooking.

The Couple is cut from:
Sweethearts Cricut Cartridge
Button #4 at 4"
 
The Heart is cut from:
Sweethearts Cricut Cartridge
Button #4 using Shadow feature at 2 1/4"

Supplies
Cricut Cartridge: Sweethearts
Stripe Pattern Paper: O Christmas Tree Paper Pad by My Minds Eye
Blue & Green Paper: Glitz & Glam Paper Pad by Core'dinations
Burgundy Paper: Nostalgia Paper Pad by Core'dinations
Baker's Twine: Blue Lagoon by We R Memory Keepers
Border Punches: EK Sucess 

How about a GIVEAWAY?

I would like to give someone this notebook & pen. For a a chance to win, leave me a comment (only one comment per person, please). Tell me what your favorite Holiday tradition is. I will be picking a winner Monday. Also, please include a way to get ahold of you.

This notebook was made using My Pink Stamper's Sweetest Cupcake Stamp Set, Sweet Treats Cricut Cartridge, and PaperTrey Ink Paper.

Now continue Hopping to more amazing projects. Your next stop is Cristi.
If you get lost along the way, I included our hopping order below. When your finished go back to www.mypinkstamper.com to join us for this challenge.


Friday, October 14, 2011

Pinkalicious Blog Hop - Cherry on Top Party Favor

Cherry on Top
Cupcake - Party Favor

Welcome to the Pinkalicious Blog Hop. This is where all the My Pink Stamper Designers get to show off our projects using My Pink Stamper High Quality Photo Polymer Stamps. If you are just starting to Hop, then go back to the beginning at Robyn (My Pink Stamper). If you have hopped here from Andrea then you are in the right place.


Supplies & Instructions
Cricut Cartridge: Sweet Treats
Cupcake Party Favor - Button #4 - Party Favor - Cut at 4"
Tag - Button #4 - Tag - Cut at 3.25"
Pen: Sakura White Gelly Roll
Paper: Paper TreyInk & Core'dinations
Paper Filler
Ribbon
Twine

Thank you for checking out my project and I hope I inspired you with this Simple Creation. The next stop on the Hop is Renee (RockinRenee). If you lose your place along the way, see the Blog Hop Order is below.

Blog Hop Order
 
 June


Tuesday, August 9, 2011

My Pink Stamper-New Release-Samples

Freshly Baked


This Yummy Cake Card was made using My Pink Stamper's NEW Yummy-licious
I made it for a little boy's birthday. So I had to give it blue frosting.


This is such a fun stamp set to embellish a yummy card, treat bag, or gift box with yummy desserts. So with this yummy stamp set, I used the perfect Circut Cartridge, Sweet Treats.

Supplies & Instructions
Sweet Treats Cricut Cartridge
Cake Card - 5.5"
Paper: Core'dinations
Ink: Stazon - Timber Brown
Stickles: Icicle

View all the My Pink Stamper NEW Releases at www.mypinkstamper.com

Also, Friday, August 12 @ 8pm (CST) we will have our fun Pink-a-licious Blog Hop. Begin the Hop, Friday Evening, at www.mypinkstamper.com


Tuesday, July 26, 2011

Birthday Cupcake Card

A little boy is celebrating his 1st Birthday with a Cupcake themed party. So I made this card especially for him.


Supplies & Instructions:
Paper: All the paper is Core'dinations, except the white on the inside.
Cricut Cartridge: Sweet Treats - button #6 - 5.25"
Stamps: My Pink Stamper - Sweetest Cupcakes Stamp Set
Embossing Folder: Cuttlebug Seeing Spots
Embelishments: Stickles - Star Dust
                          Stazon - Ink
                          Sakura Gelly Roll - White Pen

Wednesday, July 13, 2011

Custom Wedding Album

Wedding Album Gift
I had a custom order for a 8"x8" Wedding Album. It made the perfect Wedding Gift. I tried to keep everything simple & elegant. So I used Black & White and accented it in Apple Red, which was their wedding color. All of the photo mats are 4.25" x 6.25" so that 4"x 6" photos will fit perfect in them. So all the Bride & Groom have to do is adhere there pictures & the album is complete. I am sorry for some glare on the pictures. I took the pictures while it was in the album so I could keep it all together. Scroll down to the bottom for the album details.


Cricut Cartridges Used
Alphalicious
Lyrical Letters
Sweethearts
Sweet Treats

Pattern Paper
Making Memories Wedding 8x8 Paper Pad

Album
8x8 Album from Michael's

I hope you enjoyed this project. I was amazed I was able to complete this who album so quickly. By using pattern paper from one pack & accenting with Red & Black, keeping all the photo mats the same size, and the designs simple helped make this album simple & quick. Now I have all of these cuts saved on my Gypsy, so the next Wedding Album will be even simpler because it is already designed. This is a great way to make a personalized gift than a special couple will cherish for a lifetime. I even included adhesive squares for them to mount there pictures with.


Saturday, May 7, 2011

NSD Challenge #11 - Use Pink, Green and Black

Join the National Scrapbooking Day Challenges at www.mypinkstamper.com  


I posted a video for this hour on My Pink Stamper click HERE to see it.
I love how this project turned out.


Cricut Cartridge Used
Sweet Treats:
Card #25 on overlay at 5"
Tag #24 on overlay at 2.5"

NSD Challenge #7 - Scrapbook Page

Join the National Scrapbooking Day Challenges at www.mypinkstamper.com


My daughter will be turning 4 this summer so I made a scrapbook page for her Birthday Party.

Recipe
Cupcake Cricut Lite Cartridge
Ariel - 1.25"
Straight From the Nest Cricut Cartridge
Party Hat - Button #36 - 5"
Banner - Button #38 - 2.5"
Gifts - Button #40 - 3"
Sweet Treats Cricut Cartridge
4 - 2.75"
Color Box Cat Eye Ink - Chestnut Roan
Pop Dots
Embroidery Floss
Cuttlebug - Swiss Dots Embossing Folder

You are so sweet...I could hug you! - Everyday Sentiments
Happy Birthday - Birthday Crazy (just released yesterday)
It's a...Birthday Party! - Birthday Crazy (just released yesterday)

NSD Challenge #6 - Tag in Project

Join the National Scrapbooking Day Challenges at www.mypinkstamper.com


Recipe
"Just Because" Cards Cricut Cartridge
Button #21 Outside 5.75" (glued on 2 sides), Inside 5.25"
Sweet Treats Cricut Cartridge
30 candles - 2.5"
Happy Birthday Stamp - My Pink Stamper - Birthday Crazy (just released yesterday)
Wishing you years of happiness! Stamp - My Pink Stamper - Everyday Sentiments 
Paper - Core'dinations (sanded)

We have a friend's birthday party today and he is turning 30. I love how this card turned out.

Tuesday, April 19, 2011

My Pink Stamper Design Team Post - April


 Wedding Themed: Cake Box
Put candy or other yummy goodies inside the box to thank your guests for attending. Make a large cake by putting many cake boxes together. These could even be the center piece on the table.

The ribbon is for looks but also to hold the box closed. This picture shows how the cake box is put together.

How To Make:
Cake Box (button #45) -  Tags, Bags, Boxes & More Cricut Cartridge - 8"
Hearts (button #27-blackout) - Tags, Bags, Boxes & More Cricut Cartridge - 1.25" (cut 2x)

First cut out the cake box.  Then score the lines and test fold it to make sure the point will fold right. If you want to stamp the sentiment directly on the box then do it before it is glued together. I tried to stamp it on the box and that was to late so I had to stamp on another paper and then glue that down. Cut 2 hearts, pop up, and adhere. Glue the box togeher except for the square end. Use adhesive (tape runner) on the ribbon that will go on the 2 sides on the box. But don't let any tape go on the end or your guests won't get the box open. I found it helped to adhere the ribbon to the box because it would stay in place and not slide around. Insert your candy or yummy goodies into the box. Tie a beautiful bow to keep the box closed. And you have a simple but beautiful cake box. Change the stamp and decorations to make it work for any type of party favor. This project was alot of fun to make and I love how it turned out.
-----------------------------------------------------------------
Well...this was not the original project I made for this post. We were suppose to make a party favor using any theme. I found a beautiful box with a cake on it and I loved the colors, but I just didn't love the finished project. Some projects you will fall in love with and other's just aren't your favorite. I still want to share it with you.


These are front and back views.
How To Make:
Cake Favor Box - Sweet Treats Cricut Cartridge - 3.75"
button #16 Party Favor Function
You can fit 2 boxes - Fit to page on 12x12 paper
 Cake - blackout function - 3.75"
Cake Icing - 3.75"

To Purchase or View more My Pink Stamper Stamps and Products click HERE.

To see all the amazing My Pink Stamper Design Team projects click HERE.


Friday, April 8, 2011

Pinkalicious Blog Hop - April

Girl 1st Brithday Card

Welcome to our April Pinkalicious Blog Hop. It begins with Robyn at My Pink Stamper. If you are coming from Courtney from Court's Crafts, then you are in the right place.


The theme for this Pinkalicious Blog Hop is: Birthday. I was clueless about what I should make, until....I realized I have 2 birthday parties we are going to this week. Duh! I need cards for those. So I made this cute little card for our little friend, Haley, who is turning 1. The candle on an Action Wobble, so it bounces all around.
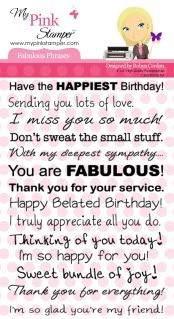
The stamp set I used is Fabulous Phrases by My Pink Stamper. This is one of my favorite stamp sets because it is perfect for cards. There is a stamp for every occasion on it and they are all on one line that can go across the width of a card.
To view all of My Pink Stamper's products and retailers click HERE.

Here is how I made the Birthday Card:
One Banner - Graphically Speaking Cricut Cartridge - 1.35"
Candle - Sweet Treats Cricut Cartridge - 5"
Haley - Once Upon A Princess - 0.86"
Most of the paper is Core'dination

How about a GIVEAWAY?

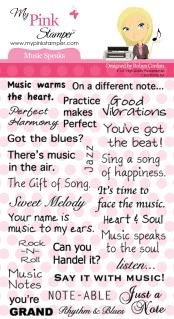
This is My Pink Stamper's Music Speaks stamp set. It has many great sayings on it. Leave me only one comment at the end of this post, telling me your favorite type of card or craft project to give to friends and family. I will pick a winner using Random.org on Thursday. As always I love readying every comment you leave me. 

From here you will hop to Kassidy at Inking It Up Crazy. When you are finished go back to Robyn at My Pink Stamper to join our challenge.

Monday, February 28, 2011

Fantabulous Cricut Challenge #49 - Shape Card

Welcome to this weeks Fantabulous Cricut Challenge. Make a Shape Card (other than a square or rectangle) using the Cricut.


Emboss-Make a wish, add Glossy Accents to the heart & stickles to the pattern paper.

Supplies Used:
Sweet Treats Cricut Cartridge - Card & layers cut 5"
White Embossing Powder
Versa Mark Ink Pad
Glossy Accents - on the heart
Sakura White Gelly Roll Pen
Stickles
Visit FCCB to check out all the other design team projects and to join us for this challenge.


Wednesday, February 16, 2011

Guest Designer for Crafting with Cristina - Swing Card

I am so honored to be chosen as a Guest Designer for Crafting with Cristina. She inspires so many of us with techniques and videos. I love all the scrapbooking layouts she makes. If you haven't found her blog yet. Check it out HERE.

For this project I was challenged to make an interactive card. At first I wasn't sure what that meant. So I searched online and I found this awesome card called the Swing Card. This wasn't my idea. Swing cards can be found online. I found a great video tutorial at Michelle's Rubber Room. You can check out her video & design, but I am also going to share a video of how I made my card. I was so excited to shoot a video because I haven't done one in a while. Sorry, I was trying a new angle for my camera and cut out a few things, but I still included the important details.

Thank you for checking out my project today & I hope you enjoy. This is such a fun card to make.


Cricut Cuts
Sweet Treats Cricut Cartridge
Button #26 - 2" - flower, shift, layer, layer shift
Button #27 - 2" - shift, layer

Supplies
Cuttlebug- Swiss Dots Embossing Folder
Stickles- Star Dust
Stazon- Jet Black Ink
Color Box Cat Eye Ink- Rouge
Pop Dots


Monday, January 31, 2011

Cupcake Invitations

Cupcake Baby Shower Invitations 


 So, I have had a busy week. I made 70 Cupcake Baby Shower Invitations for a friend. I wanted to share with you how I made them and some tips for how to make so many & not get board with them.


Instructions
 Sweet Treats Cricut Cartridge
Button #4 All Layers Cut at 4.5"


Inside Stamp - Martha Stewart Stamp

Stickles

Tips
To make so many effectively I layed everything out on my gypsy as close as I could. Each layer I put as many on the mat as possible for an 8.5"x11" paper. I used 2- 8.5"x11"paper packs from Michaels to create it. The pinks were from the Butterfly Wings & then also the Black & White Pack. Because I was cutting out so many, I even titled each layer- how many pages I needed to cut and what color. Then I pulled out that many pages & cut all of that layer and then moved on to the next layer & repeated the process. After I had everything cut, I started adhering them in sets of 10. By working with sets of 10, I didn't get tired of any one step. It was also a great way to keep track of how any I had done. I finished them off with the cherry, a dot of stickles, and the Sweet Cupcake stamp. I have to say that My Pink Stamp Stamps are an amazing quality photopolymer stamp. I stamped it 70 times right on the invitations & never messed up. It looks so clear & crisp. I use Stazon black ink with it & it looks amazing. I was so suprised that I was able to complete them from start to finish in 2 days (along with my normal responsibilities around the house). 

I hope these tips help you know you can achieve a large project without being overwhelmed by it. 
Just break it down in to steps.

Then after I finished them the soon to be mother had a 2nd ultra sound and found out that she is having a boy. So now I will be creating Baby Invitations with the monkey from Create A Critter.
At least they know other ladies who are having girls that can use these invitations.