Showing posts with label Cricut. Show all posts

Monday, April 28, 2014

Thanks Card - Cricut Artiste


Thanks matchbook card cut from the Cricut Artiste Cartridge 
from Close to my Heart


Card Base: 
Cut the card base using the fit to page size on a 12x12 mat to get the largest card possible. 
Cut from the Cricut Artiste Cartridge Card Button #35, Page #65. 


Burst Shape: Cut from the Cricut Artiste Cartridge Accent 3 Button #5, Page #35
Largest - cut in Lagoon Paper at 2 3/4"
 Medium - cut in White Paper at 2 1/2" & Stamp in Lagoon Ink
Small - cut in White Paper at 1 1/4" & Stamp in Black ink
Ink: Close to my Heart - Lagoon, Honey, Archival Black


Click on any of the links above to see where to purchase Close to my Heart Products or shop my store by clicking on the image below.

Image Gallery image


Wednesday, March 19, 2014

Easter Banner


I needed some Easter Decor in our home so I decided to make this quick Simple Creation. Sorry it is hard to take pictures of banners and really capture how they look. 


Instructions:
Paper - The Old World Stack by DCWV
Cricut Cartridge - Story Book
The paper was really thick so I had to cut everything twice. There is a setting on the Cricut E2 & in the Cricut Craft Room Software
Cuts - Button #39 basic/shift
4" & 3.5" (stretched in Cricut Craft Room)
Basic Letters from Story Book Cart 2.5"
Zots 3D between the shape layers
Clips I bought from IKEA (they hang curtains)
Twine to hang the banner
Hope you enjoy this banner and are inspired to create something for yourself. 

Angela


Birthday Wishes - Card


Simple Birthday Card


Basic Instructions:
Cut out a card base
Cut out a basic shape and use different papers to layer on it
Decorate with Washie Tape strips
Stamp Birthday Wishes (this is a My Pink Stamper Stamp)
Add dash marks with a white gel pen

Simple Card Instructions to make your own Birthday Wish Card. I love using Washie Tape for a quick simple way to dress up a card. It already is sticky so, all I have to do is rip it & put it on the paper. These cards are easy to make up alot so you can have them on hand when you need to give away a birthday card. I've learned I have given away most of my cards and its time to start stocking up again.


Tuesday, April 16, 2013

Baby Blessings

I just completed this order for a friend. Baby Blessings that guests can fill out at a baby shower.


Tuesday, January 29, 2013

100 days in school

My daughter Ariel is in Kindergarten. She had homework to make a poster with 100 things on it, to celebrate 100 days in Kindergarten. This is what she made using the Cricut.


Tuesday, May 22, 2012

Birthday Card Set

Birthday Cards

Made with My Pink Stamper's NEW Image Type "Birthday Doodles" Stamp Set
Robyn of My Pink Stamper just came out with some great products last week. New "Image" type stamps that can be colored in. Her very own line of ink pads, that stamp very well. They are my new go to stamp pads. Along with several more great products. This stamp set is only sold in a kit at the Pumpkin Spice Store. They sold out over the weekend but will have more in, in a couple weeks. So after seeing this post go to My Pink Stamper to see all the great new products released this past week. Then go to the Pumpkin Spice Shop to order your own Kit with the Birthday Doodles Stamp Set. All shipping at Pumpkin Spice Shop will be on hold from May 25-June 8. They had an unexpected death in the family and have to travel out of the country.


To create these cards I started with a Kraft Cardstock as the base, then found some fun birthday balloon pattern paper. I cut several circles and scallop circles, different sizes with my Cricut Expression. I colored the stamped image from Birthday Doodles with Copic Markers. Then I accented the cards with twine. Finally I put all 3 cards with envelopes in this clear card box, from PaperTrey Ink. I plan to sell this Birthday Card set at an upcoming craft sale.


Friday, April 6, 2012

My Pink Stamper - Birthday Blog Hop


BIRTHDAY Wishes

Welcome to a night of fun! The My Pink Stamper Design Team & Guests would like to welcome you to a special Blog Hop, with all Birthday Projects. You can never have enough Birthday cards. You should be hopping here from Alex, if not go back to My Pink Stamper to start at the beginning of the blog hop to find a lot of great inspiration.

We have a Birthday Party this weekend for a 4 year old boy.
So I came up with this quick simple card.


I started this card as an A2 size card until I wanted to use this blue paper for the water but it wasn't wide enough. So I cut my card down to the with of my blue paper. I love the new size. Because I cut it down, the sentiment flag can hang over the edge of the paper and still fit in an envelope.


 Supplies & Instructions
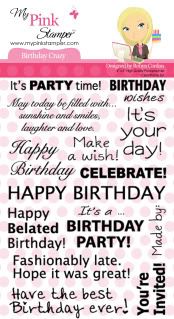
Stamp Set: My Pink Stamper - Birthday Crazy
The perfect Stamp Set for any type of Birthday Card.


Cricut Cartridge: "Just Because" Cards
Boat on button #44 - Cut at 3"

Paper: Kraft Cardstock & Cor'dinations Paper (Sand edges to add texture)

Foam Dots: used to raise up layers of the boat to add dimension

Next Hop to Helen's blog for another 
great Birthday Project.

Blog Hop Order
(incase you get lost along the way)


Tuesday, March 27, 2012

My Pink Stamper Design Team - Spring Project

Butterfly - Take it easy - Gift Card Holder


I created a new type of Gift Card Holder using an envelope Cricut cut. This is the second on I made and the are super simple and fun. First find an envelope cut on a Crcut Cartridge. Measure a Gift Card and guess at what size you need to cut the envelope or use Cricut Craft Room to edit the size to be exactly what you want. 

Supplies and Instructions
This Gift Card Holder was made using the Close to My Heart - Art Philosophy Cricut Cartridge
Button # 10
I edited it using Cricut Craft Room and changed it's width & height to:
W: 5.75
H: 4.75

Butterfly - button #35 - cut 1.5"
 cut it out twice - 1 blue and 1 green

Pattern Paper - DCWV The Blossoms Butterflies Stack
Glitter Paper - DCWV Flower Shower Spring Mat Stack

Stamp - My Pink Stamper - More Punny-licious
To see all of My Pink Stamper Stamps and Products click HERE.

Rhinestones

To attach the butterflies I used 1/8" score tape.
For added dimension I used foam tape to raise up one side of the sentiment.

I enjoy creating these Gift Card Holders because I can add as much dimension to it, since it can be hand delivered instead of mailed.


Check out the rest of the My Pink Stamper Design Team projects at www.mypinkstamper.com
and also join our challenge. 

Theme for Project: Spring is in the AIR!!!! Let's welcome Spring with the colors YELLOW, GREEN & BLUE. You may use other colors but must have Yellow, Green and Blue somewhere in the project. You must also have some type of Butterfly in your project.


Friday, March 9, 2012

Pinkalicious Blog Hop and Giveaway

Good Luck Card
 Pin It

Welcome to the Pink-alicious Blog Hop.
If you are coming from Carissa's (Sprinkled with Glitter) Blog then you are right on track. If not, then begin the hop at www.mypinkstamper.com


The theme for this challenge is: St. Patrick's Day! Think Green! Show us a card, layout, mini book, party idea, home decor--anything! 
I had alot of fun creating this clover leaf. I cut 4 - 1 1/2" hearts from 2 different colors of paper. The top layer I scored and folded in half. Then adhered it with 1/8" score tape to hold down the center fold. I topped it off with a rhinestone that I colored with a green Copic Marker.


Instructions and Supplies
Card Base: 5 1/2" x 5 1/2"
Card Layer: 5" x 5"
Cuttlebug Embossing Folder: Seeing Spots - then sand the spots
Cricut Cartridge: Home Accents
Cut 4 - 1 1/2" hearts from 2 different colors of paper = total of 8 hearts
Sand the edges of hearts
Fold and Score the hearts that will be on top
Rhinestone: Color with green Copic Marker
Twine: PaperTrey Ink
Paper: Green - Core'dinations (3 shades of green)
Kraft - PaperTrey Ink
Round corners
Pen: White
Ink: Stazon - Timber Brown


Stamp: My Pink Stamper - Fancy Phrases Stamp Set
To see all of the My Pink Stamper stamps, click HERE.

Today I have a give away for you. 
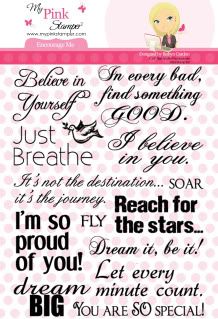
My Pink Stamper - Encourage Me Stamp Set
This is large stamp set with great sentiments to make anyone's day special.
For a chance to win: Leave only one comment at the end of this post. 
Tell me what your favorite part of Spring is. I love getting to know my readers. 

Spring is my favorite season in the Midwest, United States. I love it when the weather begins to warm up, the flowers start to emerge out of the ground, and the trees being to bud. I love flower beds and I can't wait till it is warm enough to get outside to clean up my flower.

I will draw a winner on Tuesday.


Your next place to hop and be inspired is Andrea (Divine Domesticity)
Here is the Blog hop order in-case you get lost along the way.


Blog Hop List--March

Thank you for visiting Simple Creations Paper Crafts! 
Come back again soon for more inspirational projects.

Angela