Showing posts with label Doodlecharms. Show all posts

Tuesday, April 24, 2012

My Pink Stamper - Design Team - Teacher Gifts

Teacher Gifts
This is the first year that I have someone in school. My daughter Ariel is in pre-school. She has learned so much! So I want to give this Pencil Holder to her teacher, as a token of my appriciation. 


I started my project by recycling an empty Instant Oatmeal Package
Clean up any rough edges. Then I painted it with Making Memories Paint.
Then wrapped it with paper from DCWV Grade School Stack.


Cricut Cartridge: Doodle Charm - button #37


I used an Action Wobble to add dimension 
but it also allows the apple to bounce around when bumped.

Now go to www.mypinkstamper.com to enjoy all the amazing projects the My Pink Stamper Design Team has created for Teacher Gifts.


Friday, September 9, 2011

Pinkalicious Blog Hop - School Album

First Day of School - Album

Welcome to the Pinkalicious Blog Hop. This is where all the My Pink Stamper Designers get to show off our projects using My Pink Stamper High Quality Photo Polymer Stamps. If you are just starting to Hop, then go back to the beginning at Robyn (My Pink Stamper). If you have Hopped here from Alex (You Had Me At Craft) then you are in the right place.

We were challenged to make a 3D project using the Cricut and My Pink Stamper's School Day's Stamp Set.

My oldest daughter starts Preschool next week. So I wanted to make a Mini Album with pictures from her 1st day of school. Mini Albums are fun because they are Quick & Simple. To make the base of the 6"x6" Album, I used 2 sheets of 12"x12" black cardstock. Cut each sheet in half. That gives you 4 - 6"x12" pages. Then score each page at 6". Fold all the pages in half on the score line. Then overlap the pages and adhere them together. Then you will have an accordion style album that can sit up on a table to show off the beautiful pictures.


 The whole album

Backpack - Doodlecharms Cricut Cartridge - Button #38 - cut 2.5"

Apple - Doodlecharms Cricut Cartridge - Button #37 - cut 2"
Ariel - handwritten by my 4 year old


Scissors - Simply Charmed Cricut Cartridge - Shift Button #27 - cut 2.75"


Pictures of it standing up

Finding a nice paper line with great patterns and colors, definitely makes making an album easy. I used We R Memory Keepers - White Out Collection - Nonsense - 12 x 12 Double Sided Paper. I love how this album turned out and I can't wait to take the pictures and put them in.

Thank you for checking out my project and I hope I inspired you with this Simple Creation. The next stop on the Hop is 
Renee (RockinRenee). If you lose your place along the way, see the Blog Hop Order is below.


Blog Hop Order


Tuesday, April 5, 2011

Notebook with Pen

I love making Post-It note holders with pens and I never thought to make notebook covers until I saw a post that by blogging friend, Marianne from, Paper or Frabric Crafter. These notebooks are the magnetic one's you can find in the dollar sections. I decorated the outsides to go with the theme of the paper. The notebooks can be different sizes but these are the cover instructions for these. I usually make the cover with a heavy card stock, like Papertrey Ink, so that it is durable.
Notebook size: 3 1/2" x 7 1/2"
Cover size: 7 5/8" x 8 3/8"
Score cover at: 3 5/8",  4",  4 3/8",  4 3/4"
Cut middle section about 1" apart to hold pen.
When using mini pens like these the score marks are 3/8" apart. Knowing that helps alter  the measurements for other size notebooks.

 Simply Charmed Cricut Cartridge
Notes: 1"
Paper: 3.25"
Pencil: 3"


Live Simply Cricut Lite Cartridge
Flower: 2"
Stamp: Papertrey Ink - Daily Designs Sentiments


 Doodlecharms Cricut Cartridge
Apple: 2.5"
Cuttlebug Embossing Folder

COMING SOON...
I filmed a video today of a Notebook with a normal size pen and a 4x6" Sketch Pad. It also has a Lori Boyd digi stamp that I colored with Copic Markers. So check back soon to see that.

Friday night at 8pm is the Pinkalicious Blog Hop. It will start at mypinkstamper.com then hop through all the the My Pink Stamper's design team. I have an fun project to share with you then. So keep checking back for more Simple Creations.

Friday, March 11, 2011

My Pink Stamper Pink-alicious Blog Hop

Easter Layout

If you are just beginning this blog hop, please start at MyPinkStamper.com 
If you are coming from 
Edna's blog then you are in the right place.

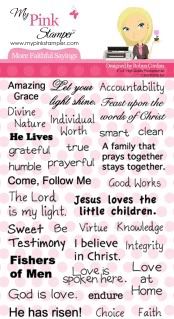
I made this Easter layout with Spring Colors and My Pink Stamper's More Faithful Sayings Stamps. I love how it turned out.

Grass was cut from Gypsy Wanderings Cricut Cartridge. Shift and it is button #42. Cut at 1.5". To create the solid grass piece across the bottom of the layout. I welded 6 grass sections together, on my gypsy, so they overlapped a little.

Basket from Doodlecharms Cricut Cartridge and cut at 2.50"
Eggs from Doodlecharms Cricut Cartridge. Large cut at 4" and Small cut at 2"
I used Glossy accents on the Eggs and Baskets. They are on pop dots so, when I applied the glossy accents the eggs curled up and made them more round like an egg.

Cute bunny!
From Create A Critter Ciruct Cartridge and cut at 2.50"

Easter was created on my Gypsy using the Alphalicious Cartridge Cricut Cartridge at 1.40". I welded the shadow letters together, angling them how I wanted to. Then I laid the normal letters over the top and lined them up just right over the shadow. Then welded the top layer together also. This made gluing them down much easier because the top layer was all one piece and the shadow was all one piece. Then I used Glossy Accents on the word to make it shinny.

I curved the stamp "He Lives" on my stamp block to stamp around this circle. The inside of the circle is a piece of Vellum that I scored lines in on my Martha Stewart Score Board to make guides to journal on. I love how it turning out. I chose to use Vellum here because I loved the patter paper and wanted it to show through.

I stamped several stamps from MPS - More Faithful Saying's Stamp Set. I lined up each side on a long acrylic block to stamp each side all at once. Then I layered it with brown paper and accented with pen stitches. Now they are ready for pictures.

Supplies Used
Pattern Paper - The Breathe Paper Collection from Prima (bought at Big Lots)
Alphalicious Cricut Cartridge
Create A Critter Cricut Cartridge
Doodlecharms Cricut Cartridge
Glossy Accents
Stazon Ink - Timber Brown
Sakura Gelly Roll White Pen 
Pop Dots

Hope you enjoyed my layout. I love all your comments and read everyone. Please come back again for more Simple Creations. I love sharing projects with you.

Next hop to:
Tracy—Craft Junkie Too
When you are finished return to My Pink Stamper to join in the fun.


Monday, January 3, 2011

Snowy Delights -FCCB Challenge #41

Snowy Delights
Make a project with snow or snowflakes. Needs to have at least one Cricut Cut on it.
Join this challenge by clicking HERE.

I made this Snow Globe card using the Doodlecharms Cricut Cartridge.

The globe is cut at 4.25"
Snowflakes are cut at 2"
Blackout feature of snowman cut at1.68"

Other supplies:
Peachy Keen "Snow Cutie Face" Stamp
Paper Trey Ink "Daily Designs Sentiments" Stamp
Pebbles Chalk
Star Dust Stickles
Embossing Powder
DCWV-the Winter matstack
Coredinations Paper
The Snow Globe is popped up and the snowman is popped up with foam dots.

Don't forget to click the link above to join us for the Fantabulous Cricut Challenge Blog 
to enter your Snowy Delight project.

Thursday, December 16, 2010

Ornament

If you are looking for the Fantabulous Cricut Crawl, "Deck the Halls", click HERE.  I want to thank all of my new followers. I have gotten so many wonderful comments. THANK YOU! I love comments. So many of you have wanted to try vinyl but haven't yet....try it! It is so much fun to work with. I have another project for you that I used vinyl and even altered it. All the vinyl was cut with the following settings. Blade 3, Speed 3, and Pressure 3.

I made this ornament for an ornament exchange tomorrow. It was alot of fun to create. 
Then I made a box to wrap it in.


I glittered a 2 5/8" ornament with Martha Stewart turquoise glitter. Then cut the snowman from Doodlecharms using the blackout feature at 1 1/2". Then Stamped it with Peachy Keen Snow Cutie stamp & Stazon Ink. I tied embroidery floss & a bell around its neck before I pushed it onto the ornament. I also cut snowflakes from the shift layer of the #23 button on Jolly Holidays. Those were cut at 3" & 2 3/4".

 The box is from Tags, Bags, Boxes, and More. It is cut using the window feature at 8 3/4". I used some scrap acetate that I have left from the cover of a stamp set. I used tacky tape to adhere it. Then tied it off with ribbon and some more bells. I think all of the ribbon I purchased from Michaels. 
I had so much fun with this project I just had to post it and share it with you.


Tuesday, November 2, 2010

Feel Better Soon

Feel Better Soon
Here is a very simple card I made using the Doodlecharms Cartridge. I just got this cartridge this week and it has a good variety of cute cuts on it. The flowers are button 10 on the boarder function. Lately I have learned that there are some great cuts on the board functions. They are hidden treasures in the cartridges since they aren't the main cut. I can't wait to use this Cartridge some more. The flower boarder was cut at 1.75". The center of the flowers and the leaves I cut twice so they would be different colors. The tag was a punch that I had. I inked all the flowers with a color box chalk ink. Like I said, this was a very simple card.


Sorry, I haven't posted much lately.
I am excited to announce that I am selling my Simple Creations at a local Salon in their Boutique. However that means I have been spending all my time creating items and not as much time posting them.
Hopefully, soon, I can share with you some gift bags and cards I created.